
What you will learn in this guide. This guide shows you how to build your own Question Bank on Testkart a central place to store questions you can reuse across your mock tests. You'll learn how to open the Question Bank section, add a question with its answer options, mark the correct answer, and save it to your bank.
Everything is done from the Testkart Teacher dashboard. No technical skills are needed you can create a question bank.
Step by step guide on how to build question bank
A. Open the Question Bank section
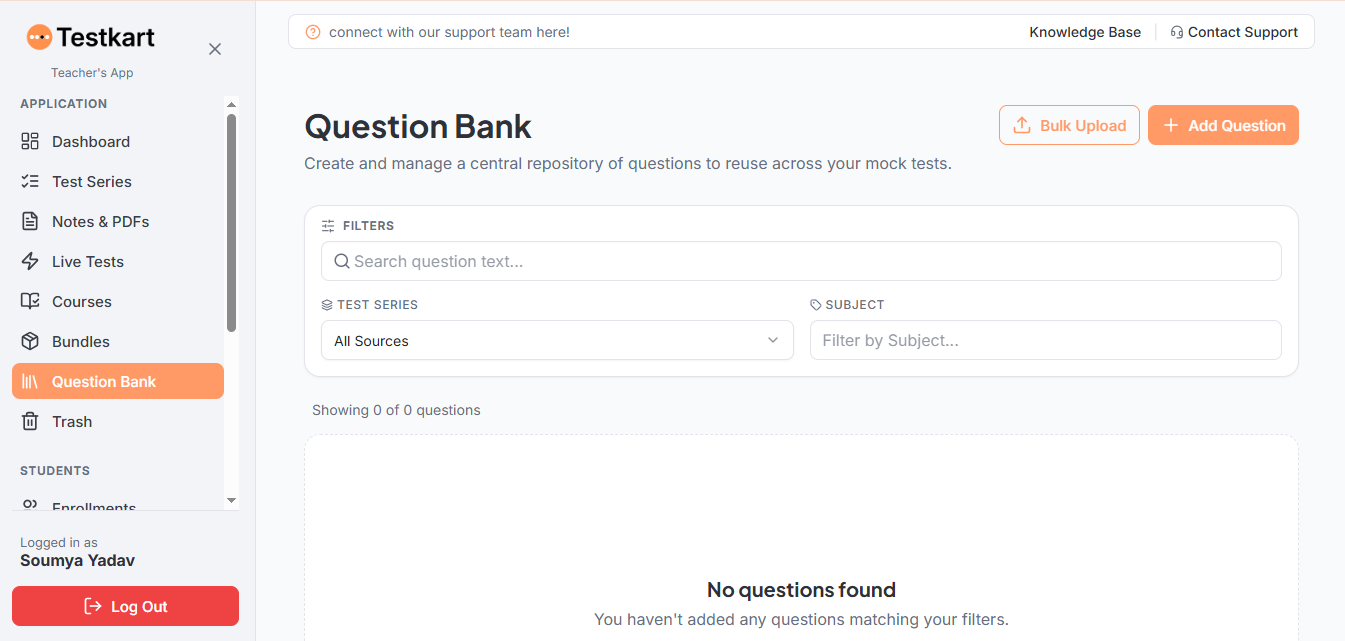
Sign in to testkart.in → Teacher’s App. From the sidebar, click Question Bank. This opens a page where you can create and manage a central repository of questions to reuse across your mock tests.
Here you'll also find Filters to search your existing questions by text, Test Series, or Subject. If you haven't added any questions yet, you'll see a message saying "No questions found."
B. Click "Add Question"
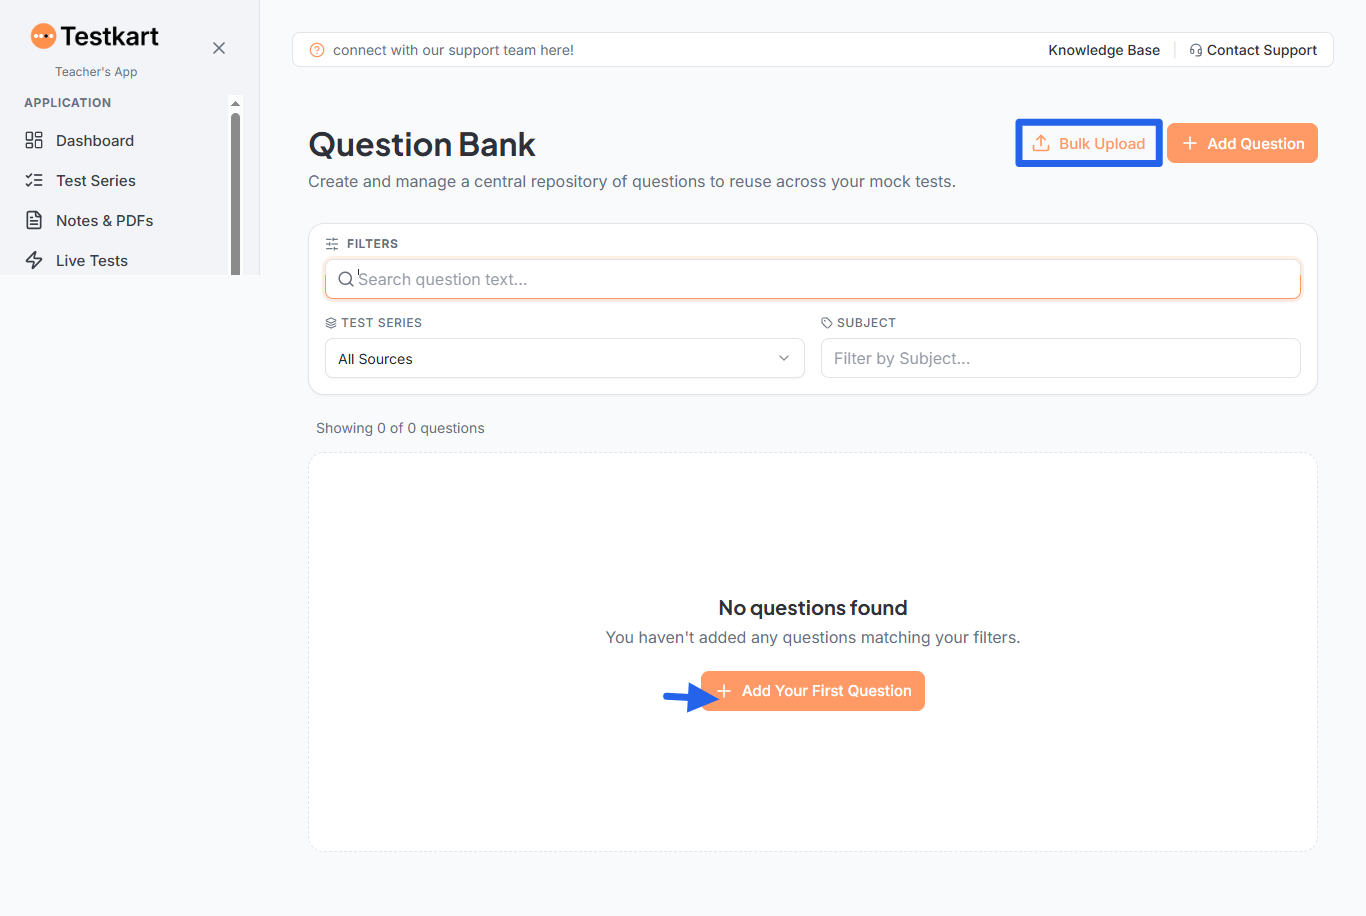
Click the orange + Add Question button in the top-right corner (or + Add Your First Question if your bank is empty) to open the question form. If you have many questions ready in a file, you can use Bulk Upload instead to add them all at once.
Step 1: Set the Exam, Subject, Question Type, and Tags
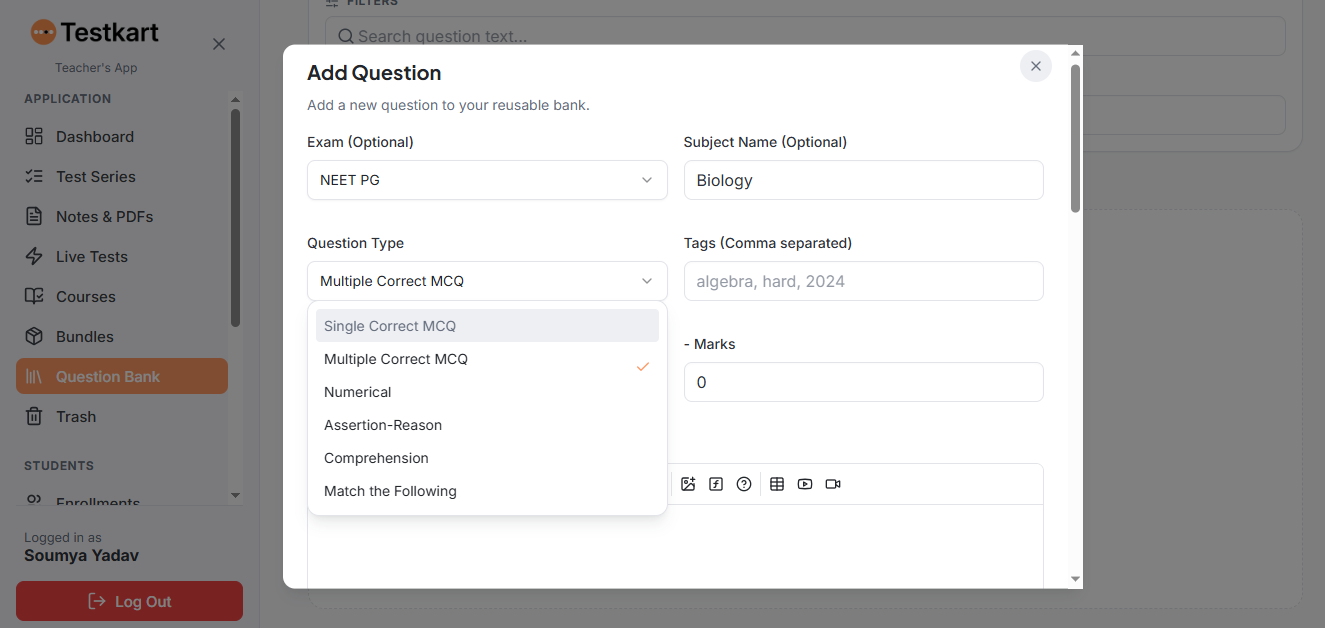
At the top of the Add Question window, fill in:
Exam (Optional) — choose the exam this question belongs to, for example "NEET PG."
Subject Name (Optional) — type the subject, for example "Biology."
Question Type — choose the format from the drop down: Single Correct MCQ, Multiple Correct MCQ, Numerical, Assertion-Reason, Comprehension, or Match the Following.
Tags (Comma separated) — add any keywords to help you find this question later, for example "algebra, hard, 2024."
Step 2: Set the Marks
Enter the marks for the question one field for marks awarded on a correct answer, and one for marks deducted on an incorrect answer (leave it at 0 if you don't want negative marking).
Step 3: Write Your Question
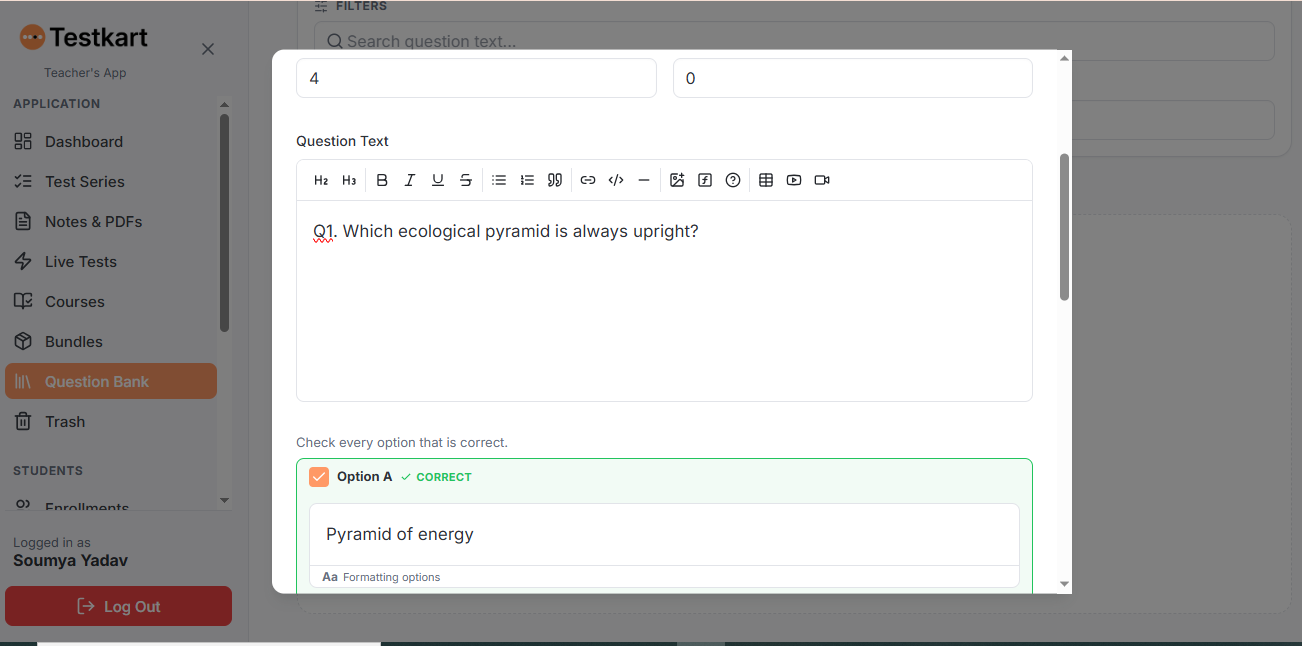
Type your question into the Question Text box. The editor gives you formatting tools headings, bold, italic, underline, strike through, lists, quotes, links, code, tables, images, videos, and even a formula option so you can format your question exactly how you want it to appear.
Step 4: Add Answer Options and Mark the Correct One
Below the question box, you'll see "Check every option that is correct." Fill in the text for each option, and tick the checkbox next to any option that is correct Testkart lets you mark more than one option as correct if needed.
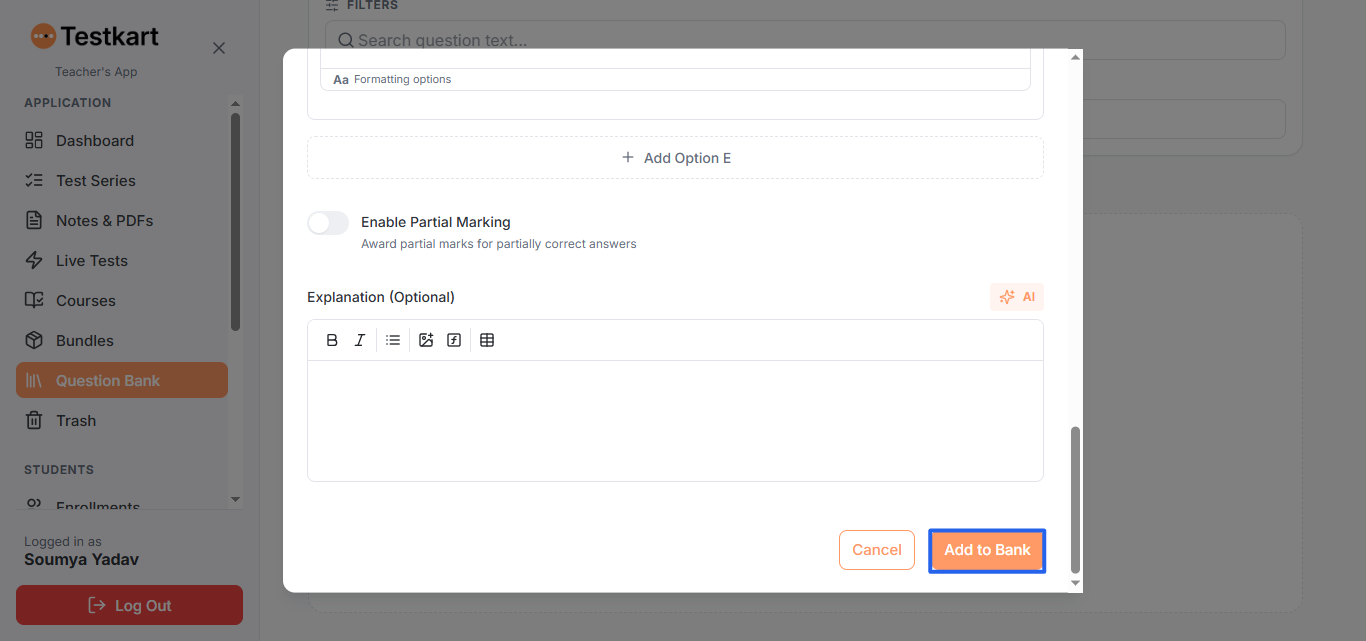
If you need more than four options, click + Add Option E to add another one.
Step 5: Add Extra Settings (Optional)
A. Enable Partial Marking
Turn on Enable Partial Marking if you want to award partial marks when a student selects only some of the correct options.
B. Add an Explanation
Use the Explanation (Optional) box to write out why the correct answer is right. You can also click the AI tag here to have Testkart generate an explanation for you.
Step 6: Save the Question
Once everything looks right, click Add to Bank to save your question. If you want to discard it instead, click Cancel.
After Adding Your Question
Your question now appears on the Question Bank page. Testkart updates the count at the top (for example, "Showing 1 of 1 questions") and shows your question as a card with:
Its question type (for example, "Single Correct Mcq")
Its source (for example, "Directly Uploaded")
The marks assigned (for example, "+4 / -0")
The date it was added
The question text itself
A Show Options button to view the answer choices
Any tags you've added (or "No tags" if none)
Edit and Delete buttons to manage the question
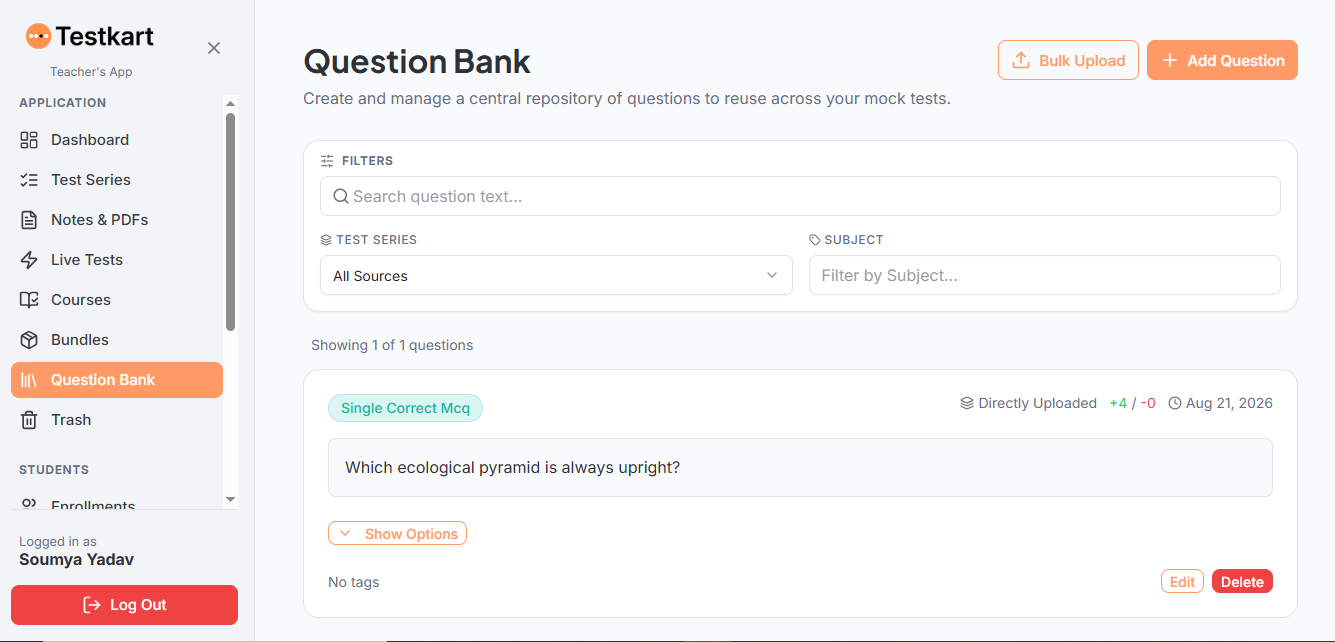
From here, your question is saved in your bank and ready to be reused across any of your mock tests.
Quick Checklist
Click Question Bank → + Add Question
Set Exam, Subject Name, Question Type, and Tags
Enter + Marks and − Marks
Write your Question Text
Fill in each answer option and tick the correct one(s)
Click + Add Option E if you need a 5th option
Toggle Enable Partial Marking if needed
Add an Explanation (or generate one with AI)
Click Add to Bank to save