
Before we begin, to create and sell anything on Testkart, a user must have an active teacher account. Ensure you signed up as a teacher and not a student.
Before You Start
A Test Series is a package of one or more timed tests (called Test Items) that you sell to students for example a full mock-exam package, or a series of subject-wise sectional tests.
Scope. This guide only covers building a Test Series it does not cover Live Tests, Courses, Bundles, or Notes & PDFs.
1. Go to the Test Series section
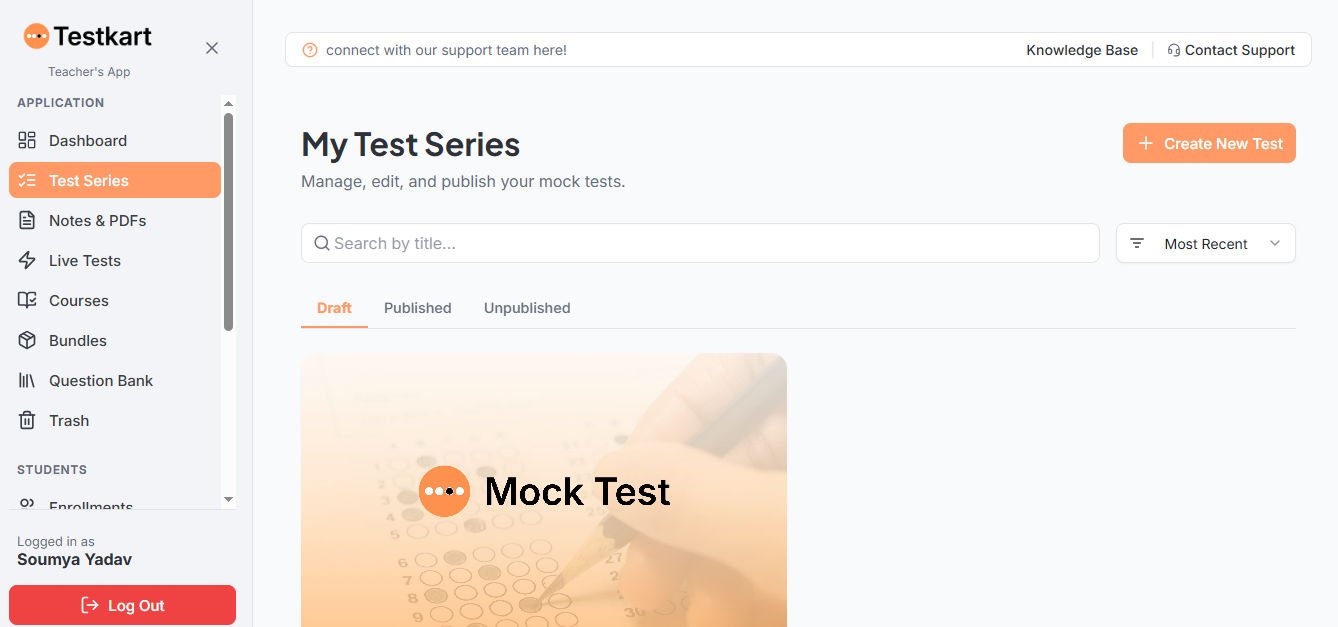
Sign in to the Teacher’s App on testkart.in, select Test Series under the APPLICATION section in the left sidebar, and click + Create New Test to begin.
2. Let AI set up your test
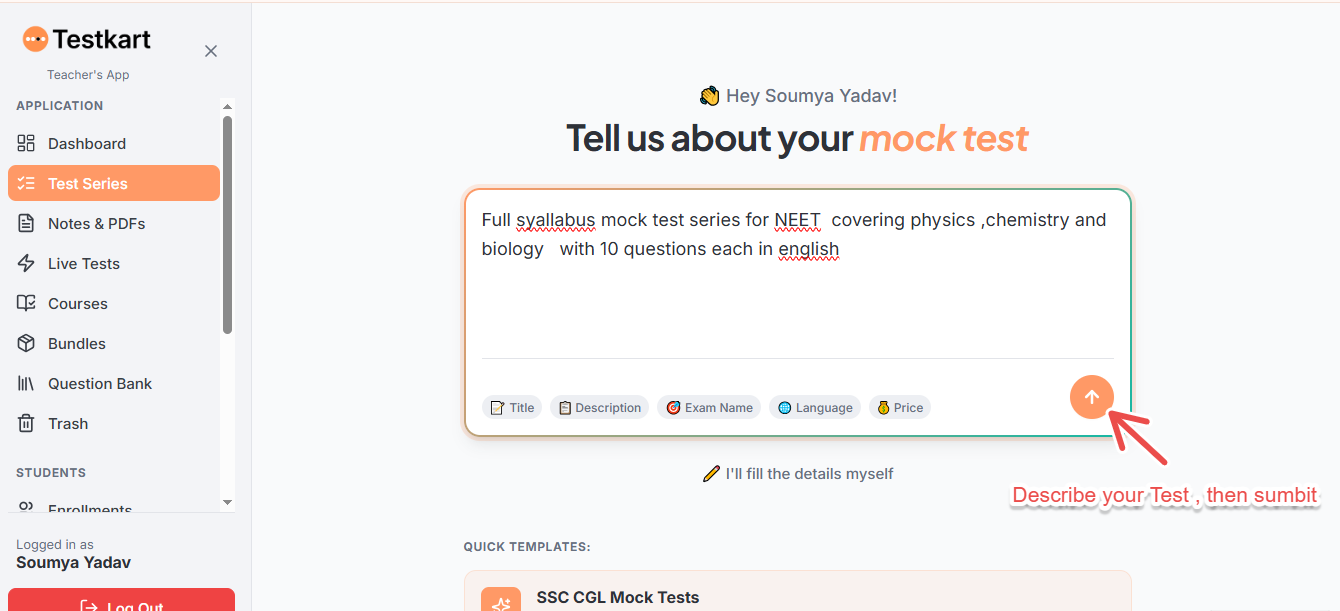
Describe your test in plain language. For example: "Full syllabus mock test series for NEET covering Physics, Chemistry and Biology with 180 questions each in English." Testkart's AI generates the title, description, exam name, language, and price for you.
3. Set pricing and number of test items
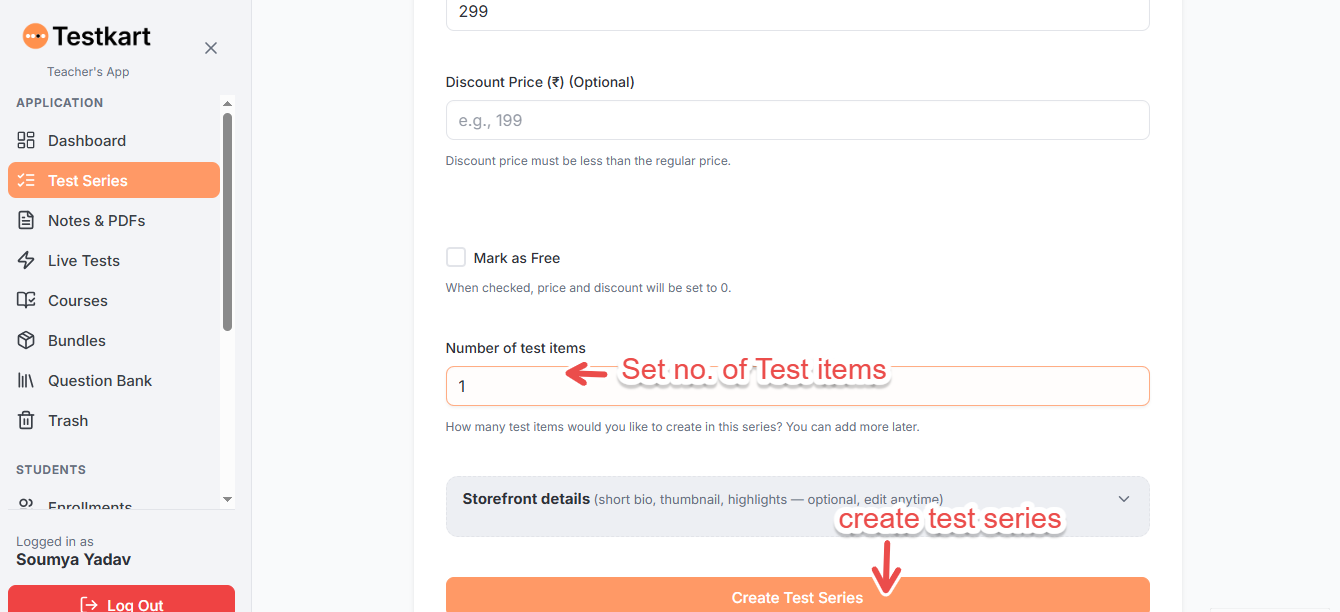
Scroll down to set an optional discount price, mark it free if needed, and set the number of test items for the series. Once ready, click Create Test Series.
4. Manage Test Items and add subjects
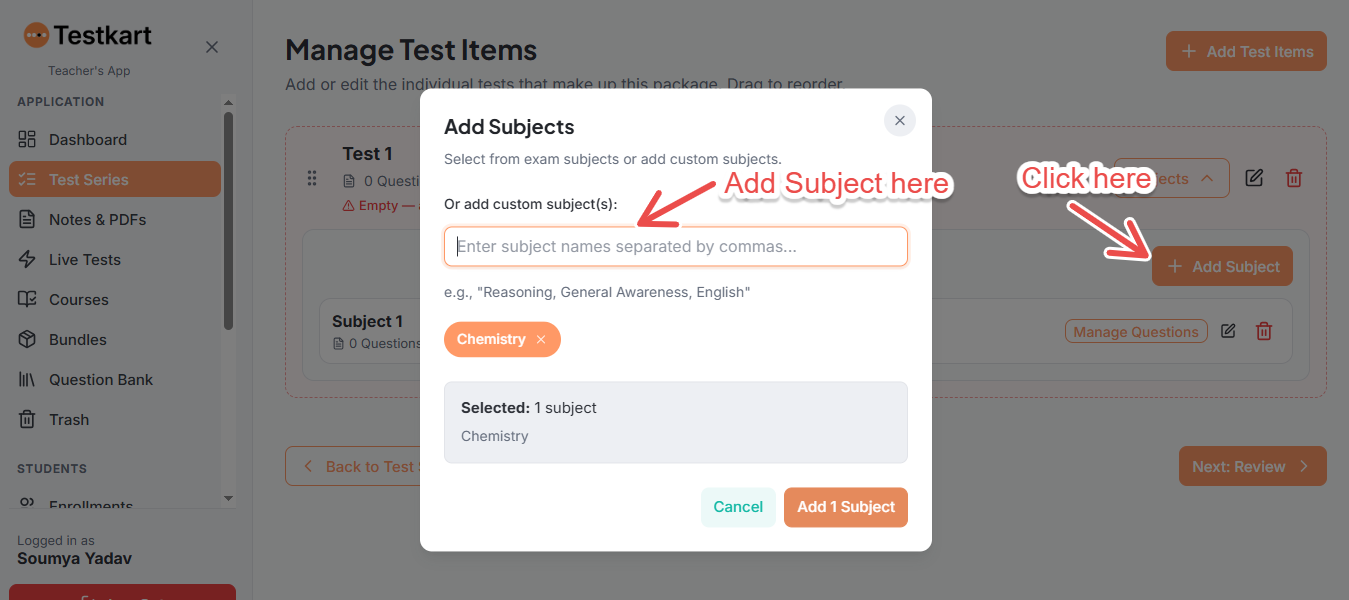
This is where the flow has changed the most. Under Manage Test Items, you can now directly add a Subject to a test right from the dropdown, or click + Add Test Items to add more test items to the package.
5. Add your questions and mark the correct answer
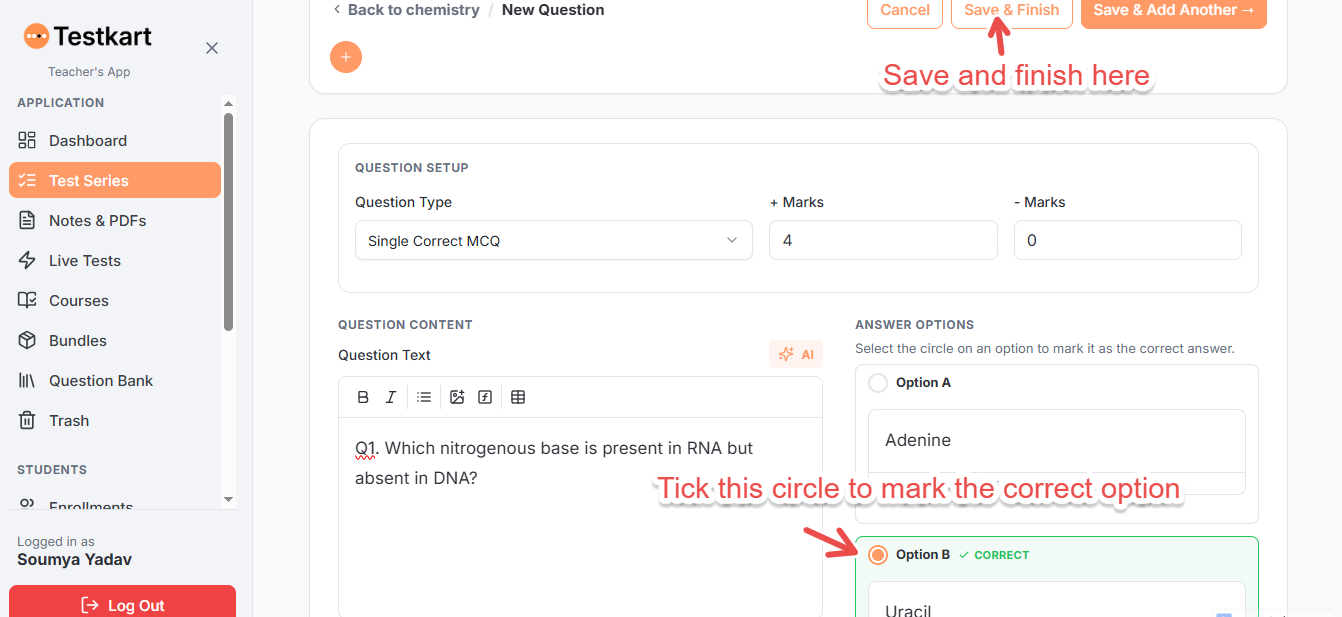
Once inside a subject, add a new question and fill in the question text and answer options. Tick the circle next to whichever option is correct. It’s marked "CORRECT" instantly. When done, click Save & Finish.
6. Preview, then head back to the test item bar
After saving your questions, use the preview option to check how the test looks. Once satisfied, go back to the test item bar to review the full structure of your test package before moving on.
7. Review and Submit
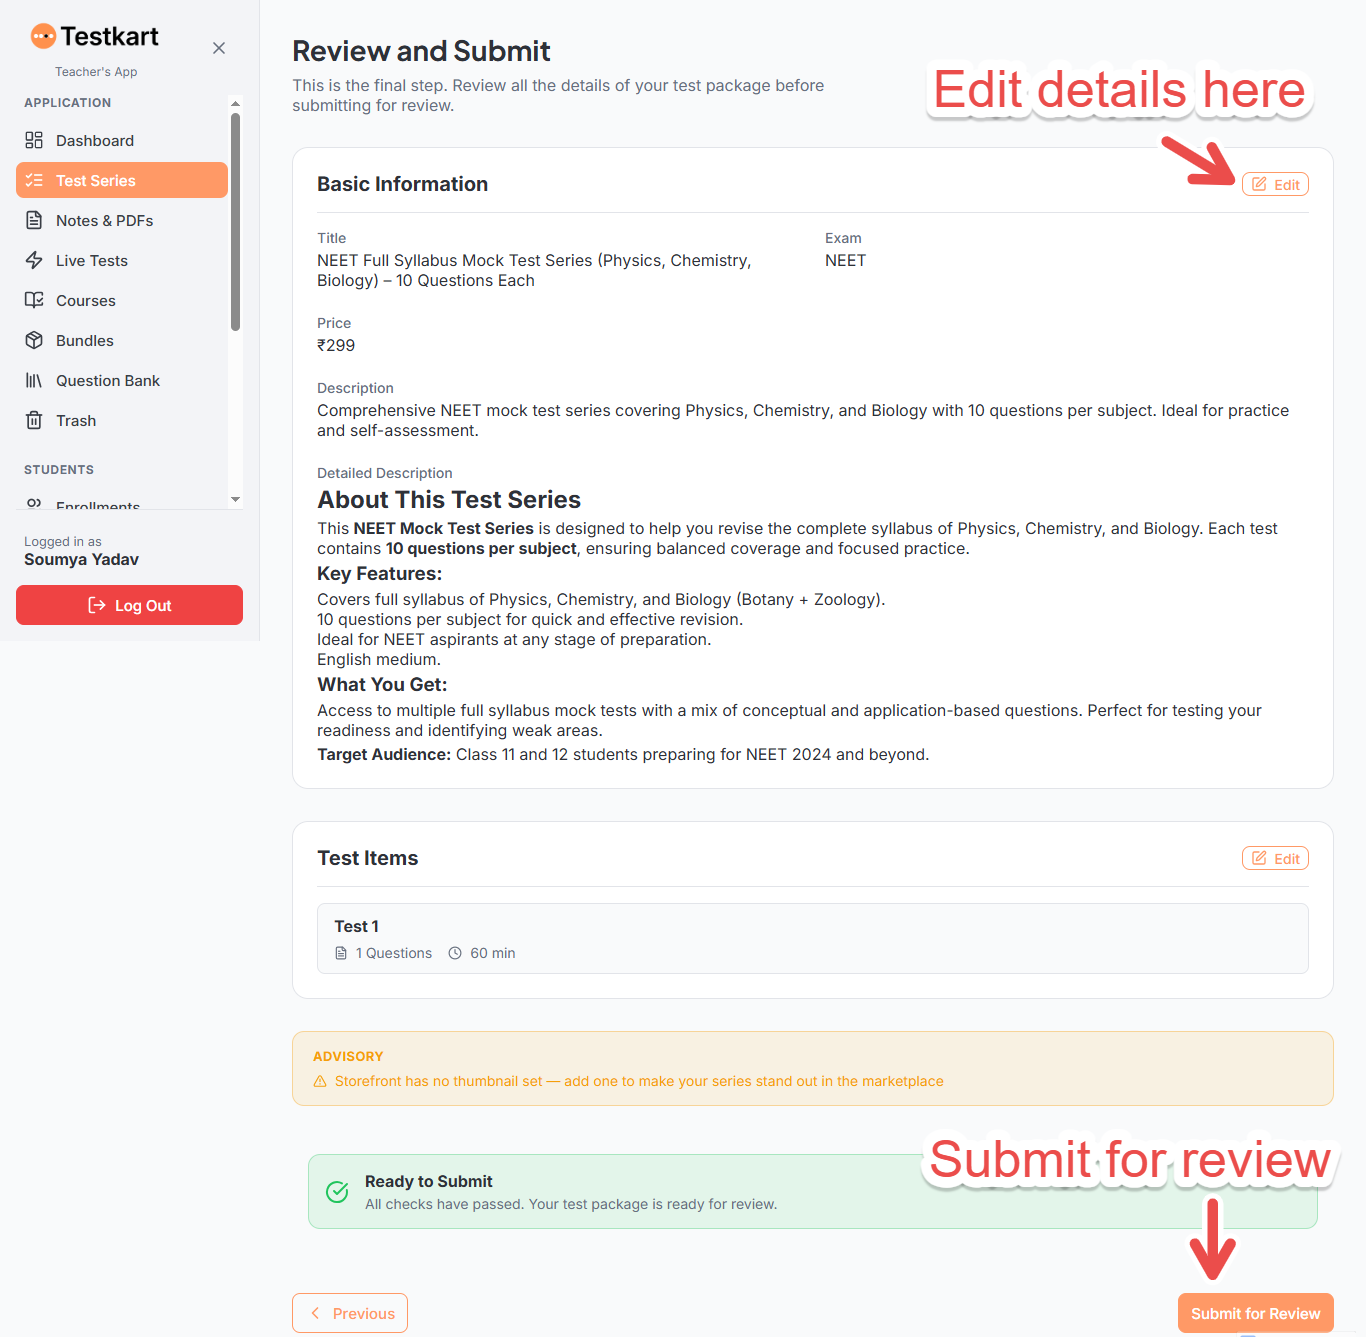
On the final step, double-check your Basic Information (title, exam, price, description, and detailed description) before submitting your test series for review.
8. Your test series is published
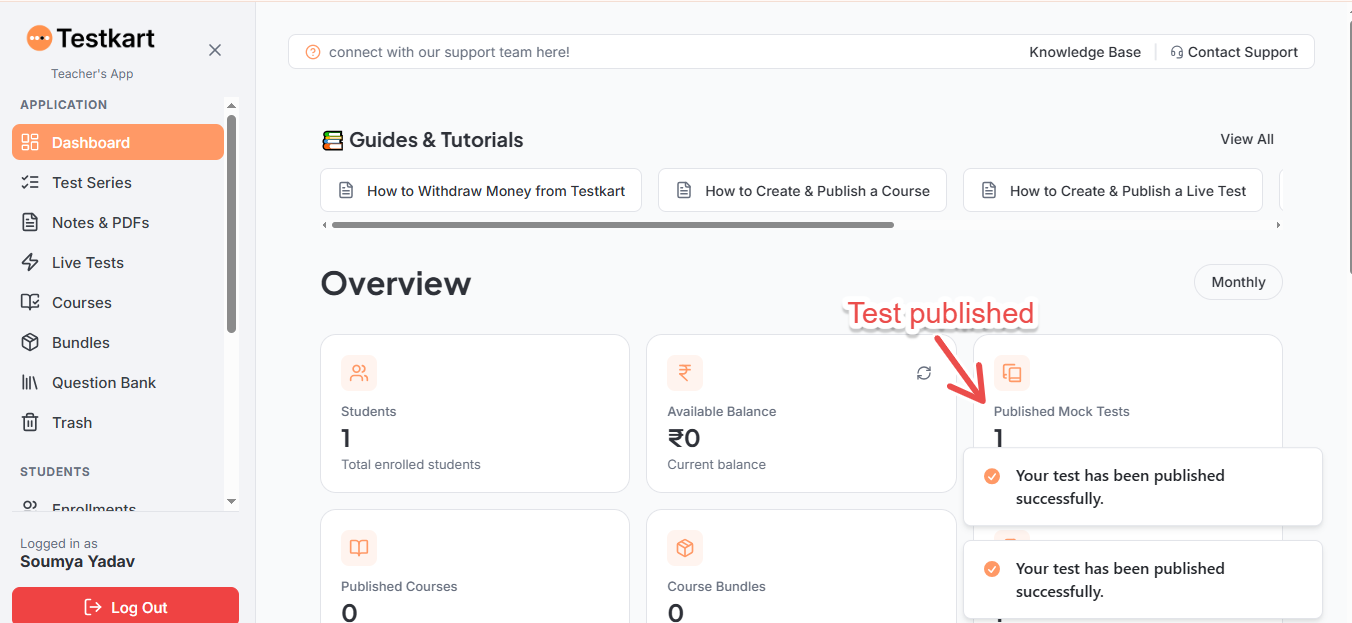
Once approved, head to your Dashboard and you’ll see your Published Mock Tests count go up, along with a confirmation that your test has been published successfully.
Quick Checklist
Go to Test Series → click + Create New Test
Describe your test in plain language and let AI generate the title, description, exam name, language & price
Set your pricing (or mark free) and define the number of test items
Click Create Test Series
Under Manage Test Items, add subjects directly or click + Add Test Items
Add questions, fill in options, and tick the correct answer
Click Save & Finish
Preview your test, then return to the test item bar
Review your Basic Information (title, exam, price, description)
Click Submit for Review
Once approved — you're live! Check your Dashboard for the Published count.