Before we begin, to create and sell anything on Testkart, a user must have an active teacher account. Ensure you signed up as a teacher and not a student.
A step-by-step guide for teachers
What you will learn in this guide. This guide walks you through the complete journey of running a live test on Testkart: opening the Live Tests section, filling in the four-step creation wizard (Basic Info, Schedule, Prizes and Review), adding subjects and questions, and finally submitting your test for review so it goes live for your students.
Everything is done from the Testkart Teacher’s App at testkart.in/teacher. No technical skills are needed — if you can fill a form, you can publish a live test.
Getting Started
A. Open the Live Tests section
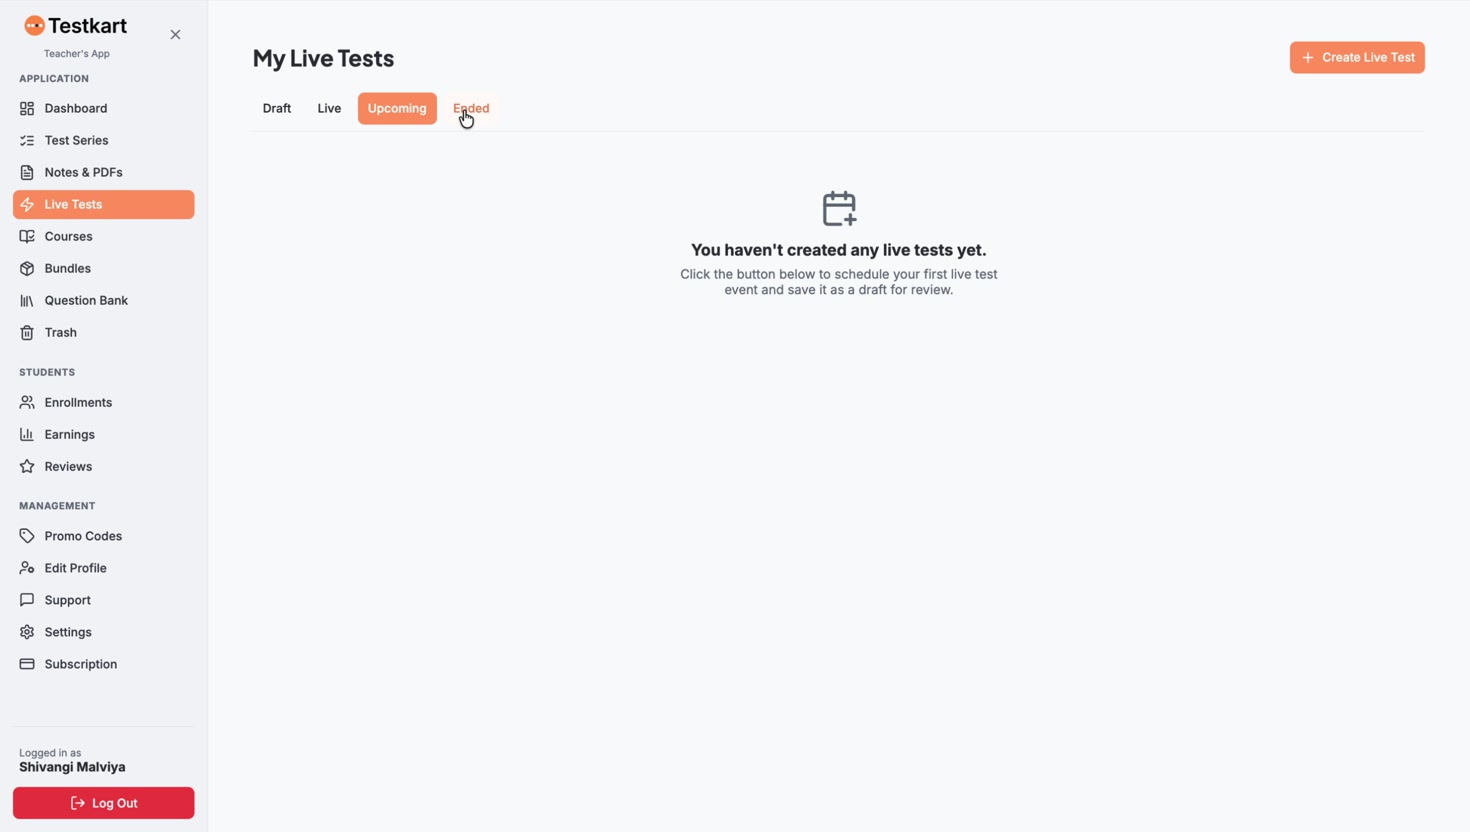
Log in to the Testkart Teacher’s App. In the left sidebar, under Application, click Live Tests. The My Live Tests page opens with four tabs — Draft, Live, Upcoming and Ended — that show your tests at every stage.
B. Click “Create Live Test”
Click the orange + Create Live Test button in the top-right corner. This opens a four-step wizard that collects everything needed for your test.
Step 1 — Basic Info
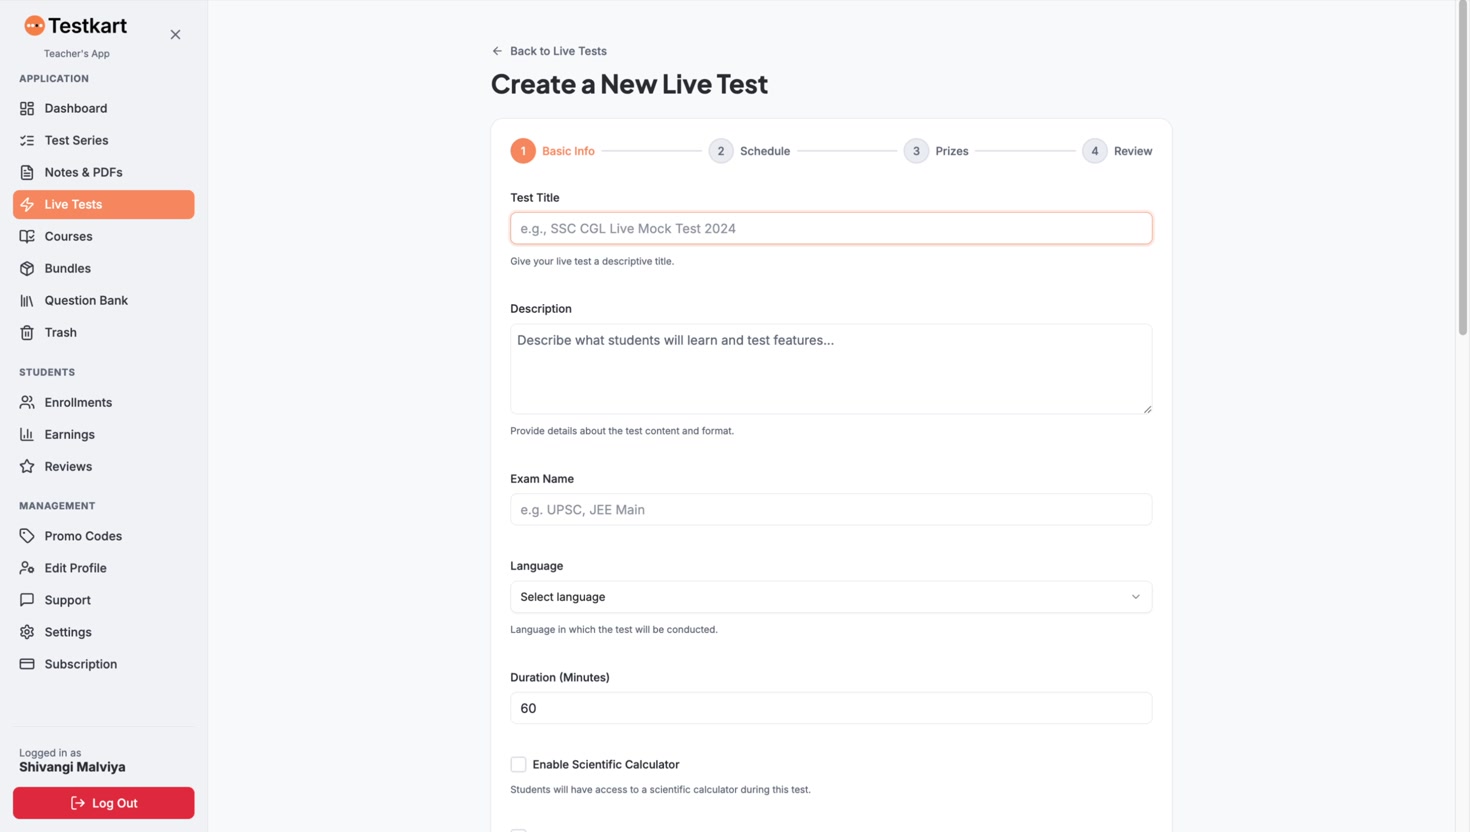
A. Give your test a title and description:
Enter a Test Title students will instantly recognise, and a Description explaining what the test covers and how it is structured. A clear description helps students decide to enrol.
B. Set the exam, language and duration
Fill in the Exam Name (for example, CBSE Class 10 or JEE Main), choose the Language in which the test will be conducted, and set the Duration in minutes.
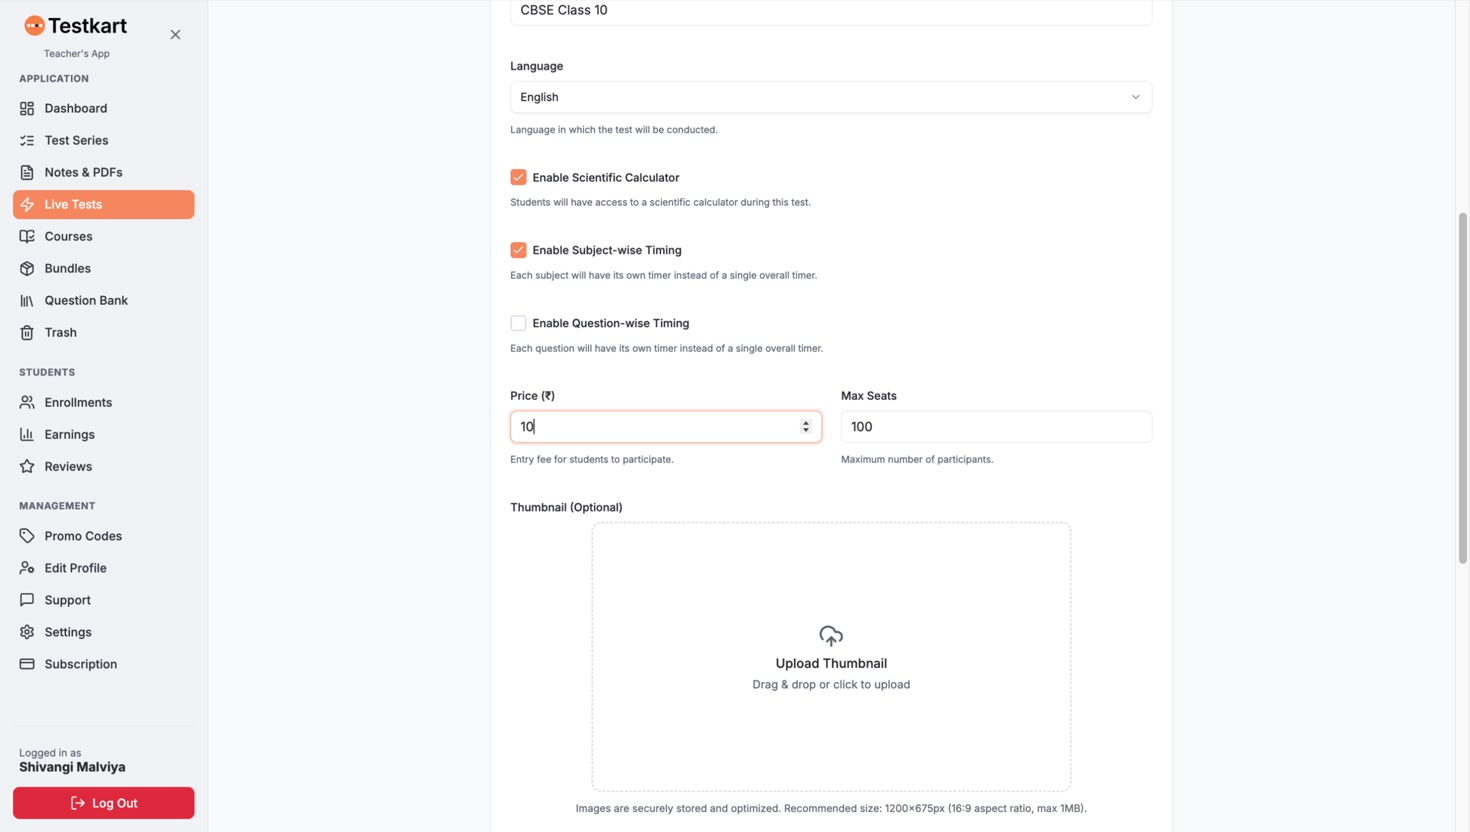
C. Choose the test options
Three optional toggles control the test experience:
1. Enable Scientific Calculator
Students get access to a scientific calculator during the test.
2. Enable Subject-wise Timing
Each subject gets its own timer instead of one overall timer.
3. Enable Question-wise Timing
Each question gets its own timer — useful for rapid-fire practice.
D. Set the price and seats
Enter the Price (₹) students pay to participate (leave empty for a free test) and Max Seats, the maximum number of participants.
E. Add a thumbnail and intro video (optional)
Upload a Thumbnail image to make your test stand out (recommended size 1200×675 px, 16:9, max 1 MB). After choosing a file, adjust it in the Crop Image window and click Crop & Save. You can also add an Intro Video by uploading a file or pasting a YouTube URL.
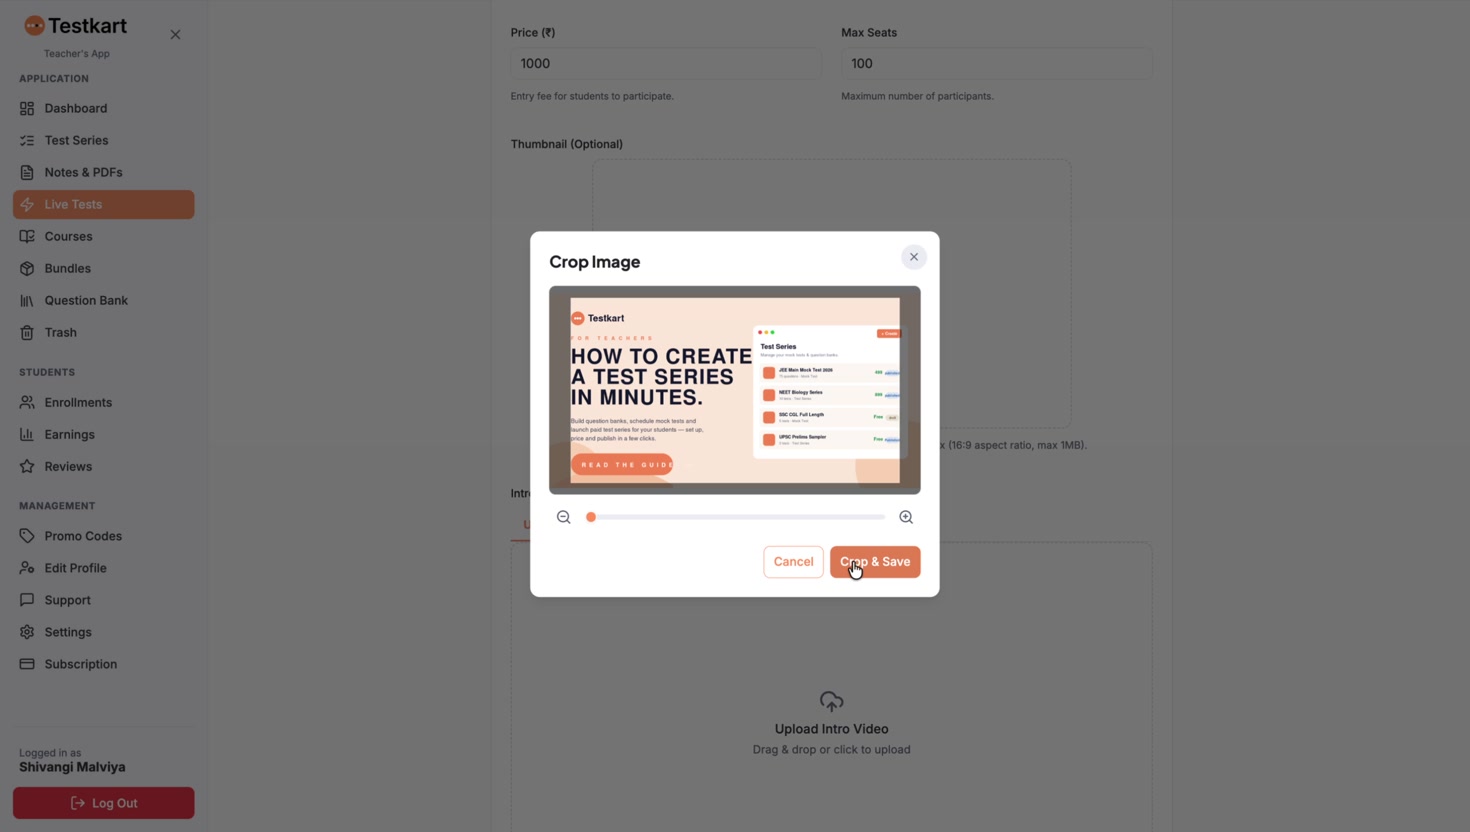
When the Basic Info form is complete, click Next at the bottom to move to the Schedule step.
Step 2 — Schedule
A. Set a registration deadline (optional)
Tick Set registration deadline and pick the last date and time for students to enrol using the calendar picker. If left unchecked, students can enrol anytime before the test ends. The deadline must be before the start time — the form warns you in red if it is not.
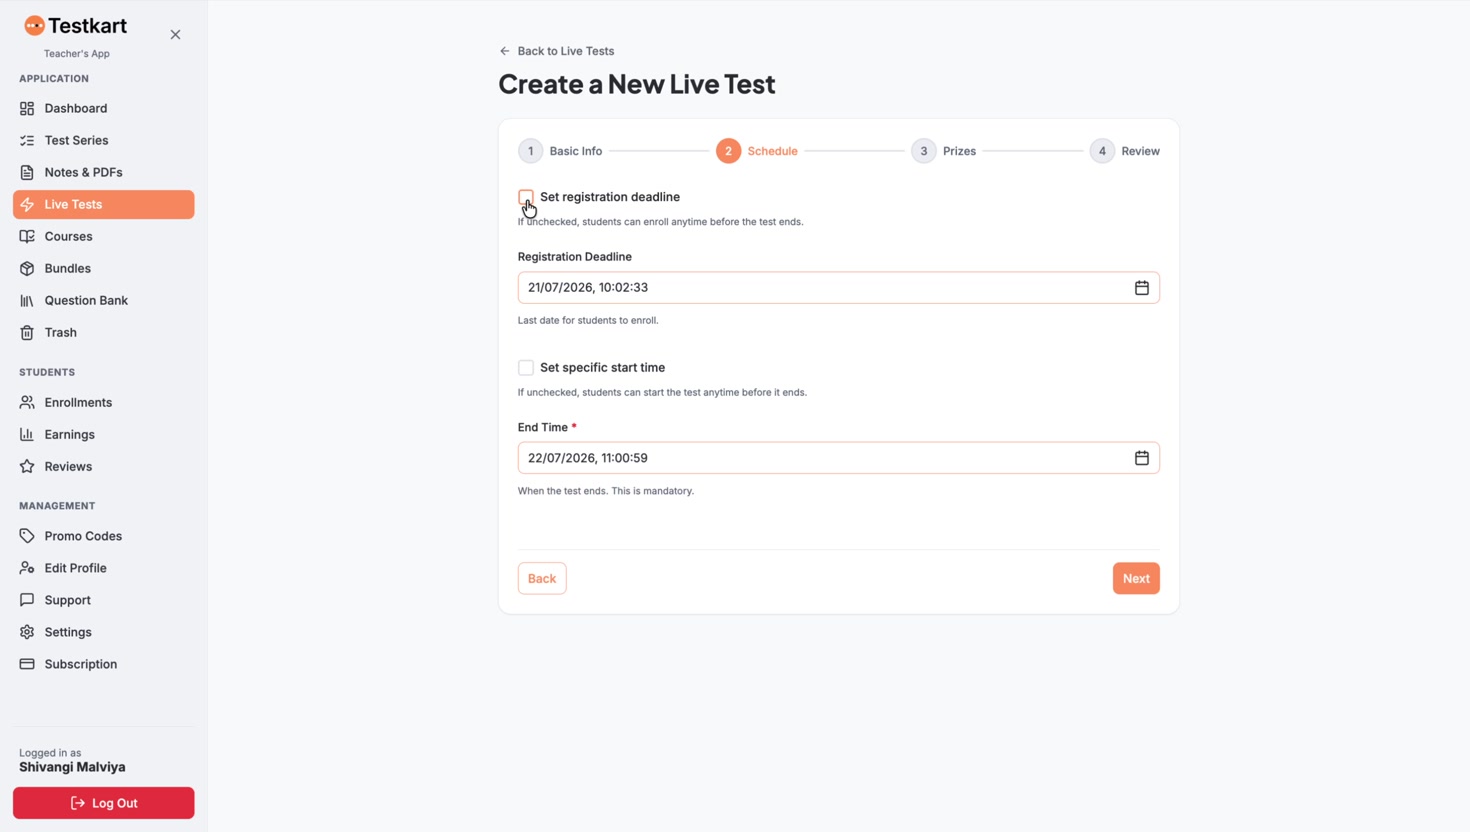
B. Set the start and end time
Tick Set specific start time to fix when the test begins; if unchecked, students can start anytime before it ends. The End Time is mandatory — it defines when the test closes. Click Next to continue.
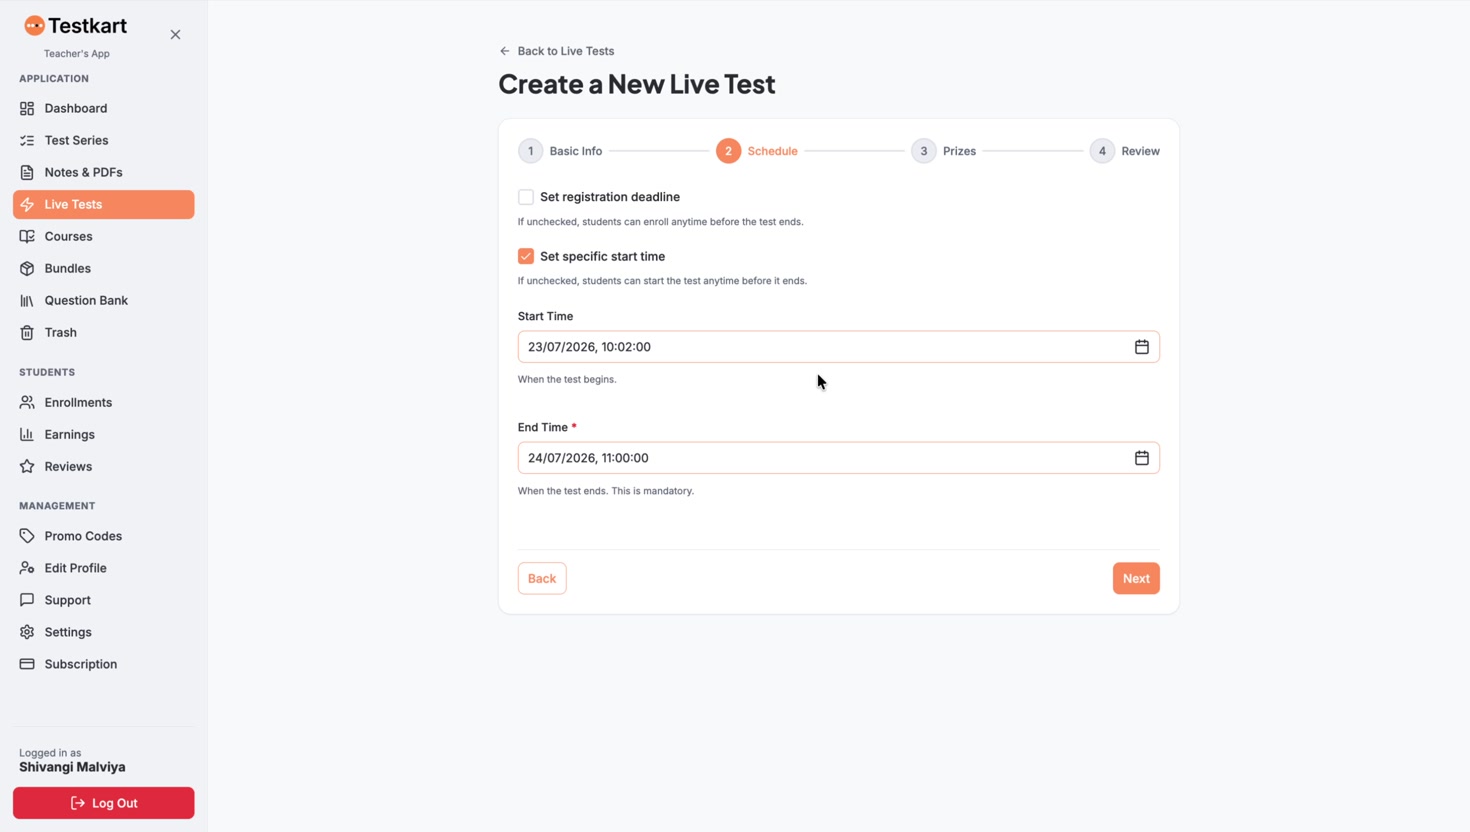
Step 3 — Prizes
A. Offer prize money (optional)
Tick Offer Prize Money to reward top performers. Enter the Total Prize Pool (₹), then split it across 1st, 2nd and 3rd Place prizes. The Remaining bar shows how much of the pool is still unallocated — distribute the full amount before moving on. Click Next when done.
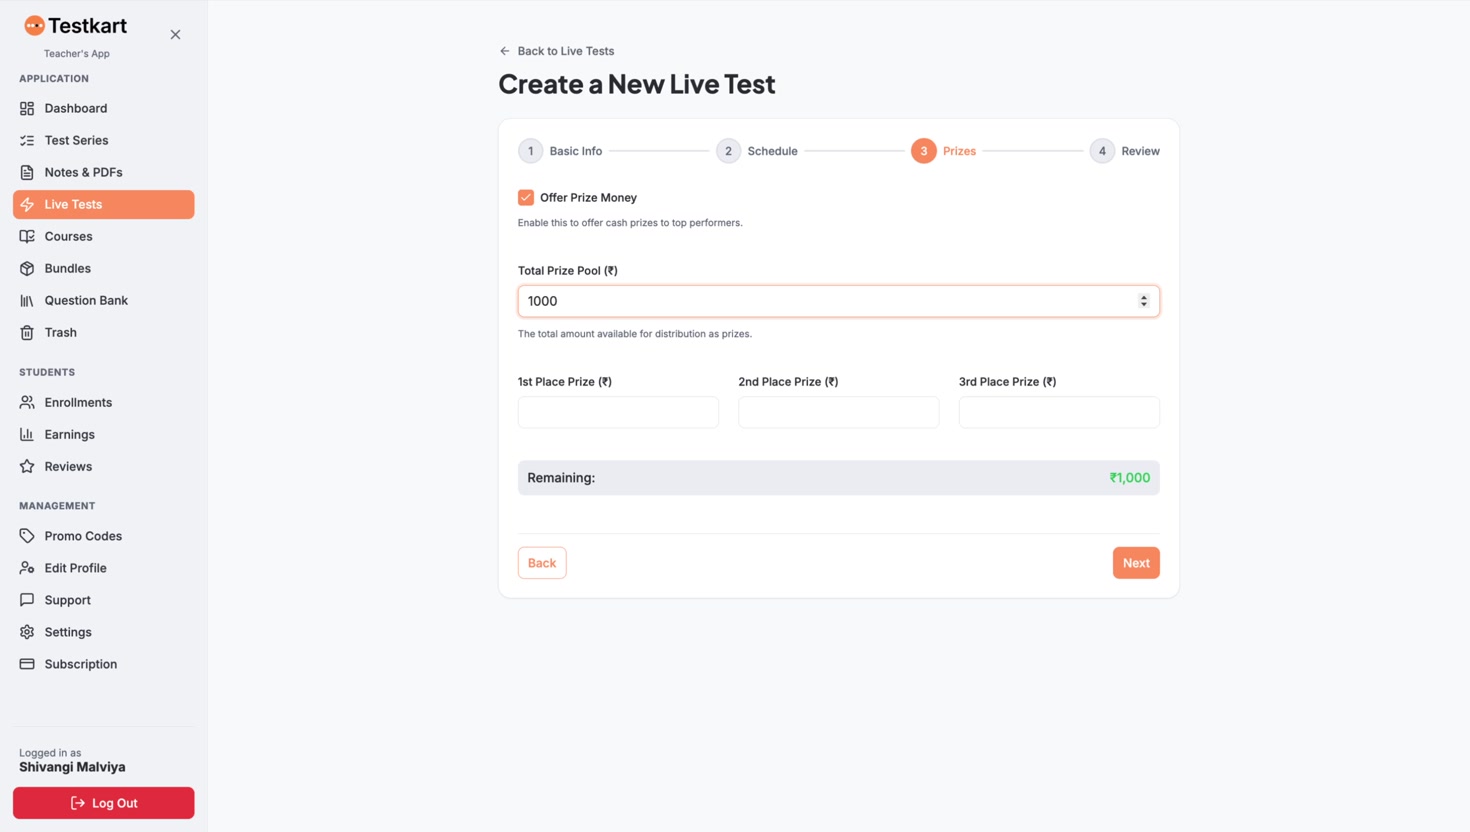
Step 4 — Review & Create
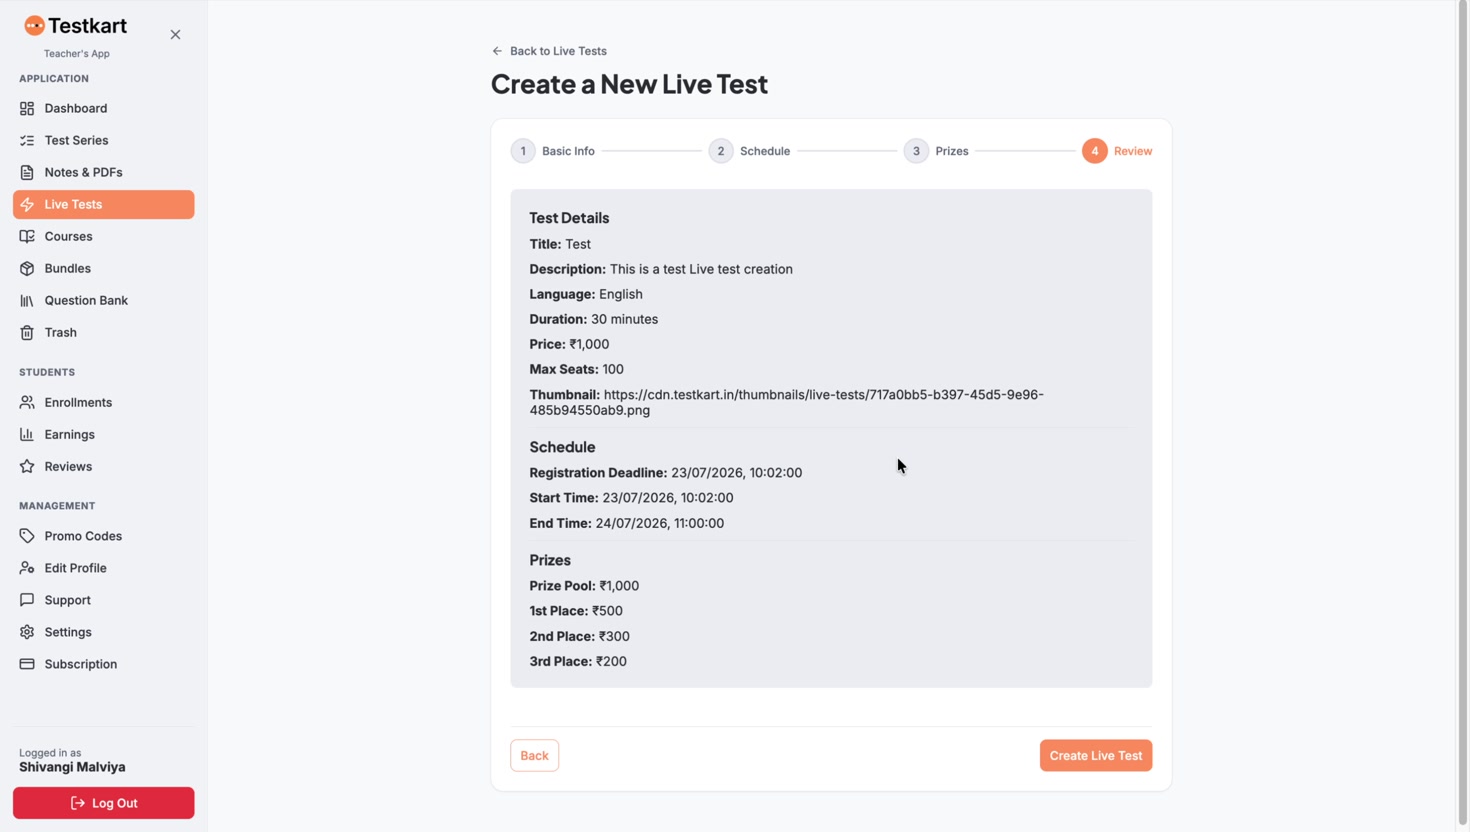
A. Check every detail
The Review step summarises everything — test details, schedule and prizes. Read it carefully; use Back to correct anything.
B. Create the live test
Click Create Live Test. Your test is created as a draft and opens on its own page, ready for subjects and questions.
Add Subjects
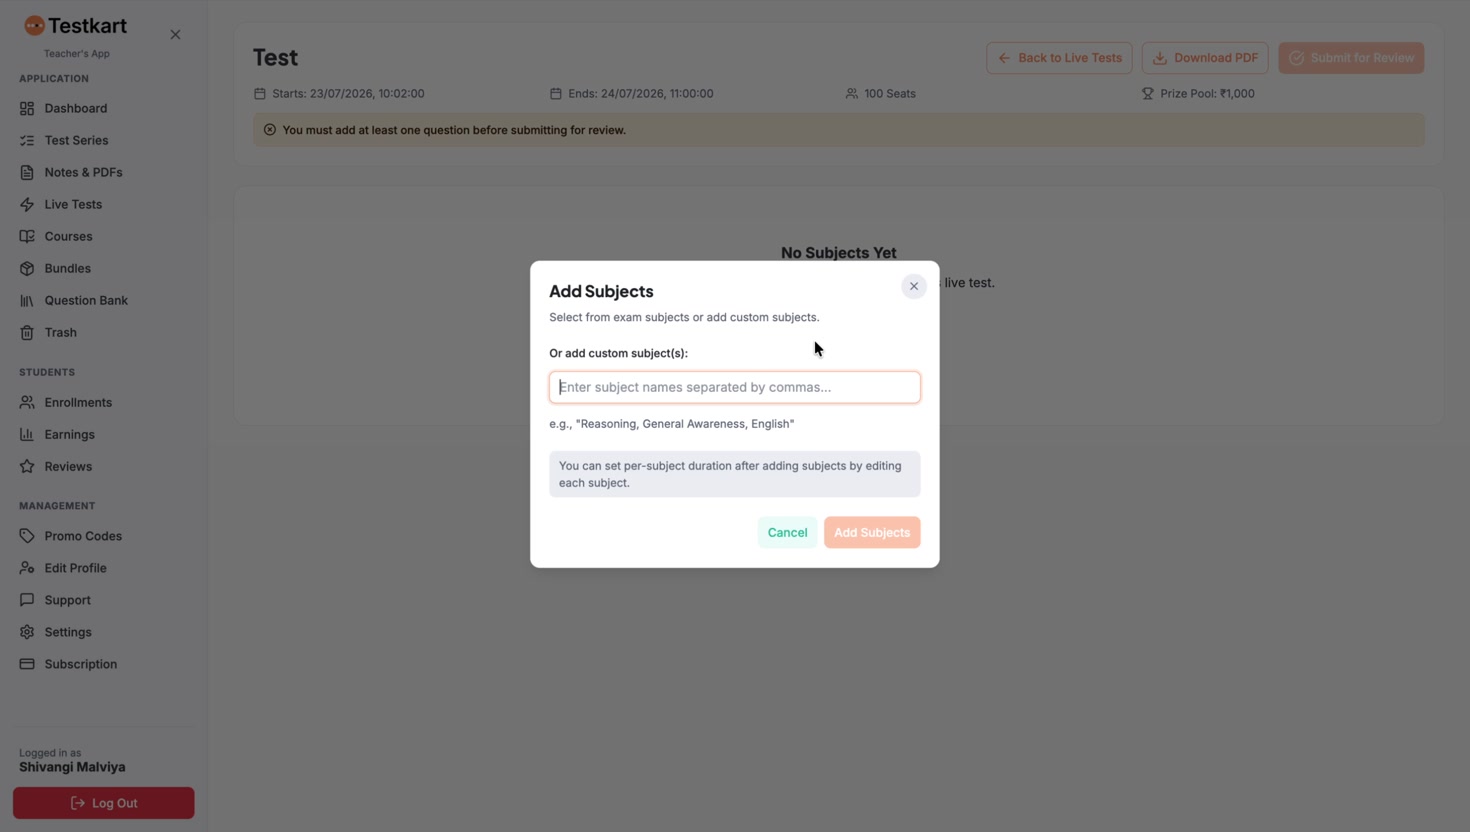
A. Create at least one subject
On the test page, an Add Subjects window appears (or click + Add Subject). Select from the exam’s subjects or type custom subject names separated by commas — for example “Reasoning, General Awareness, English” — then click Add Subjects. You can set a per-subject duration later by editing each subject.
Add Questions
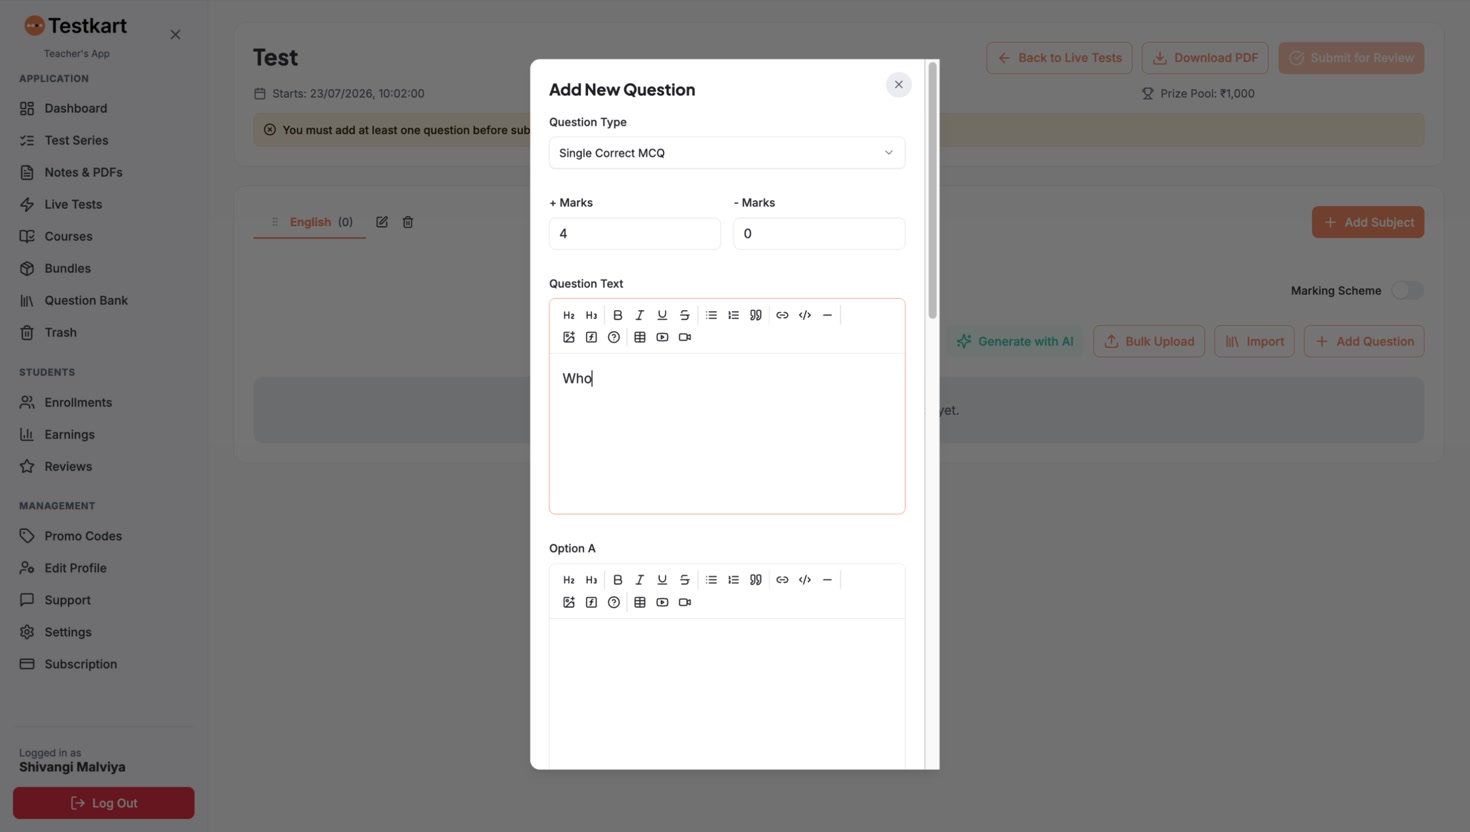
A. Open the Add Question window
Inside a subject tab, you can add questions four ways: Generate with AI, Bulk Upload, Import, or + Add Question for manual entry. Click + Add Question to write one yourself.
B. Fill in the question details
1. Question Type
Choose the format, such as Single Correct MCQ.
2. Marks
Set + Marks for a correct answer and − Marks for negative marking.
3. Question Text and Options
Type the question and each option (A–D). The editor supports formatting, images, tables and video.
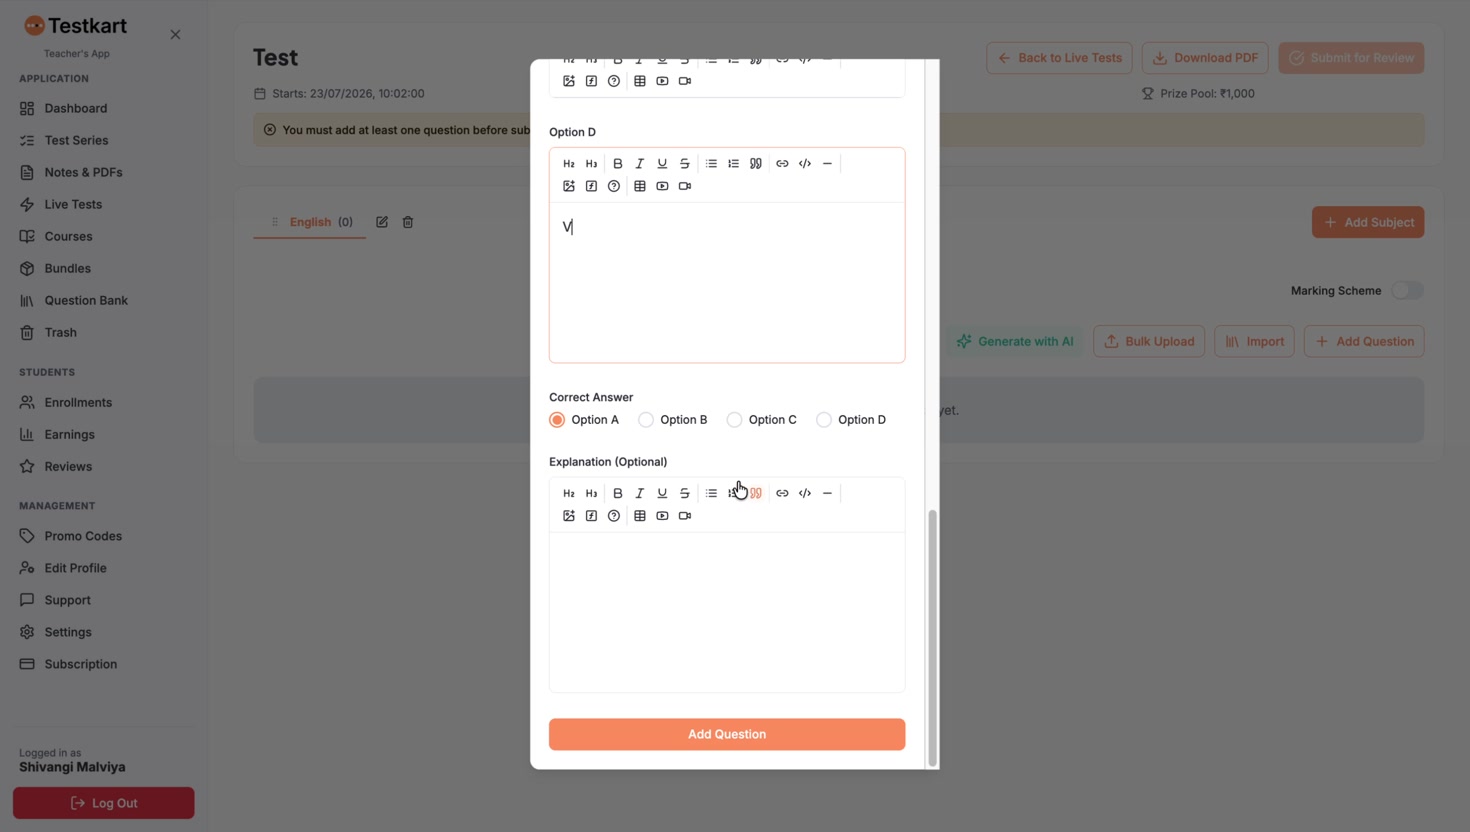
C. Mark the correct answer and save
Scroll down, select the Correct Answer (Option A–D), optionally add an Explanation students see after the test, and click Add Question. Repeat until your paper is complete — every option field must be filled, and you need at least one question before you can submit the test for review. Questions can still be edited or deleted before submission.
Submit for Review & Publish
A. Submit the test
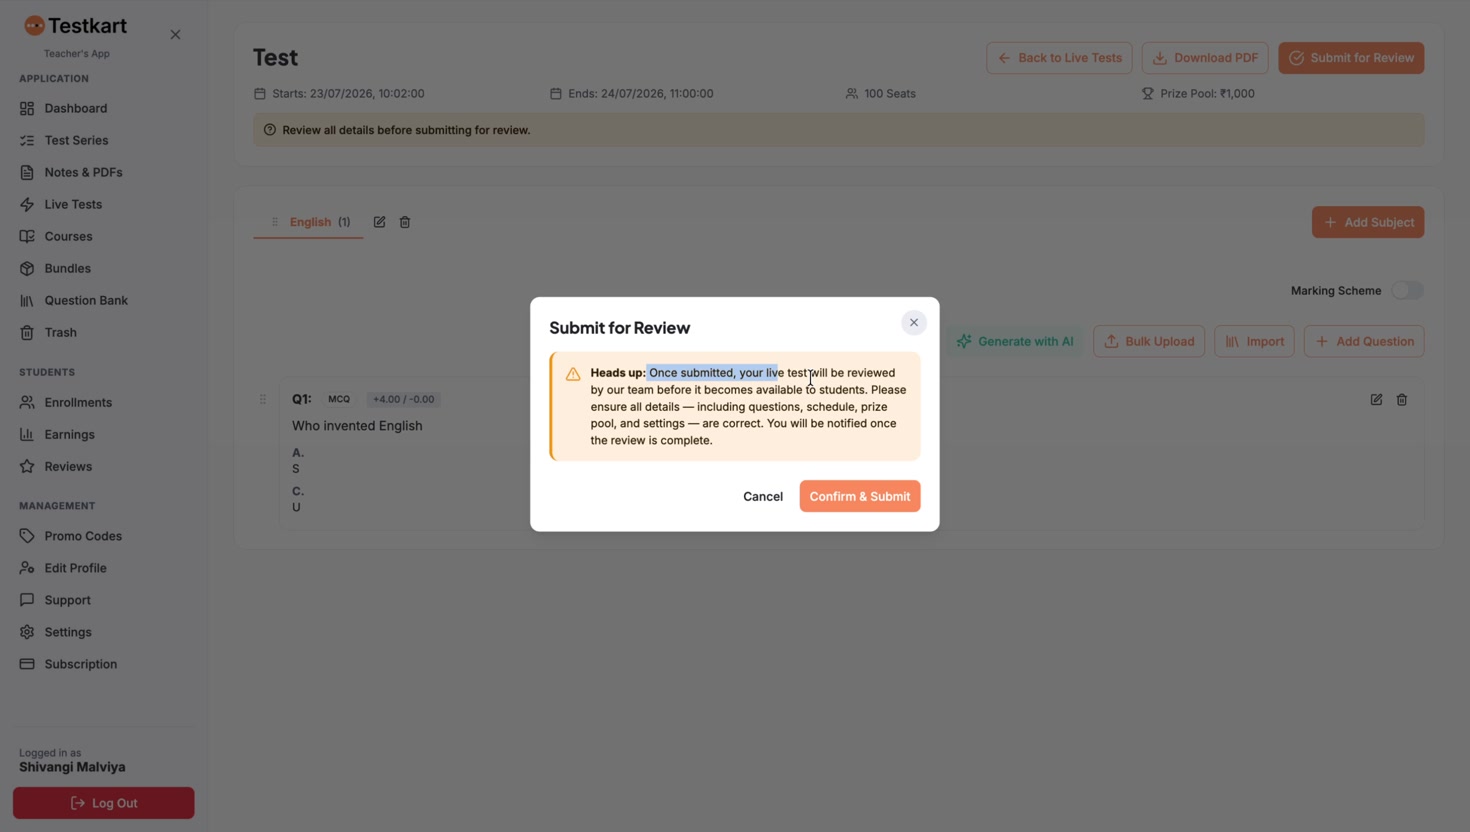
When your questions are ready, click Submit for Review at the top right of the test page. A confirmation window reminds you that once submitted, the test will be reviewed by the Testkart team before it becomes available to students.
B. Confirm & submit
Double-check questions, schedule, prize pool and settings, then click Confirm & Submit. You will be notified once the review is complete.
After Publishing
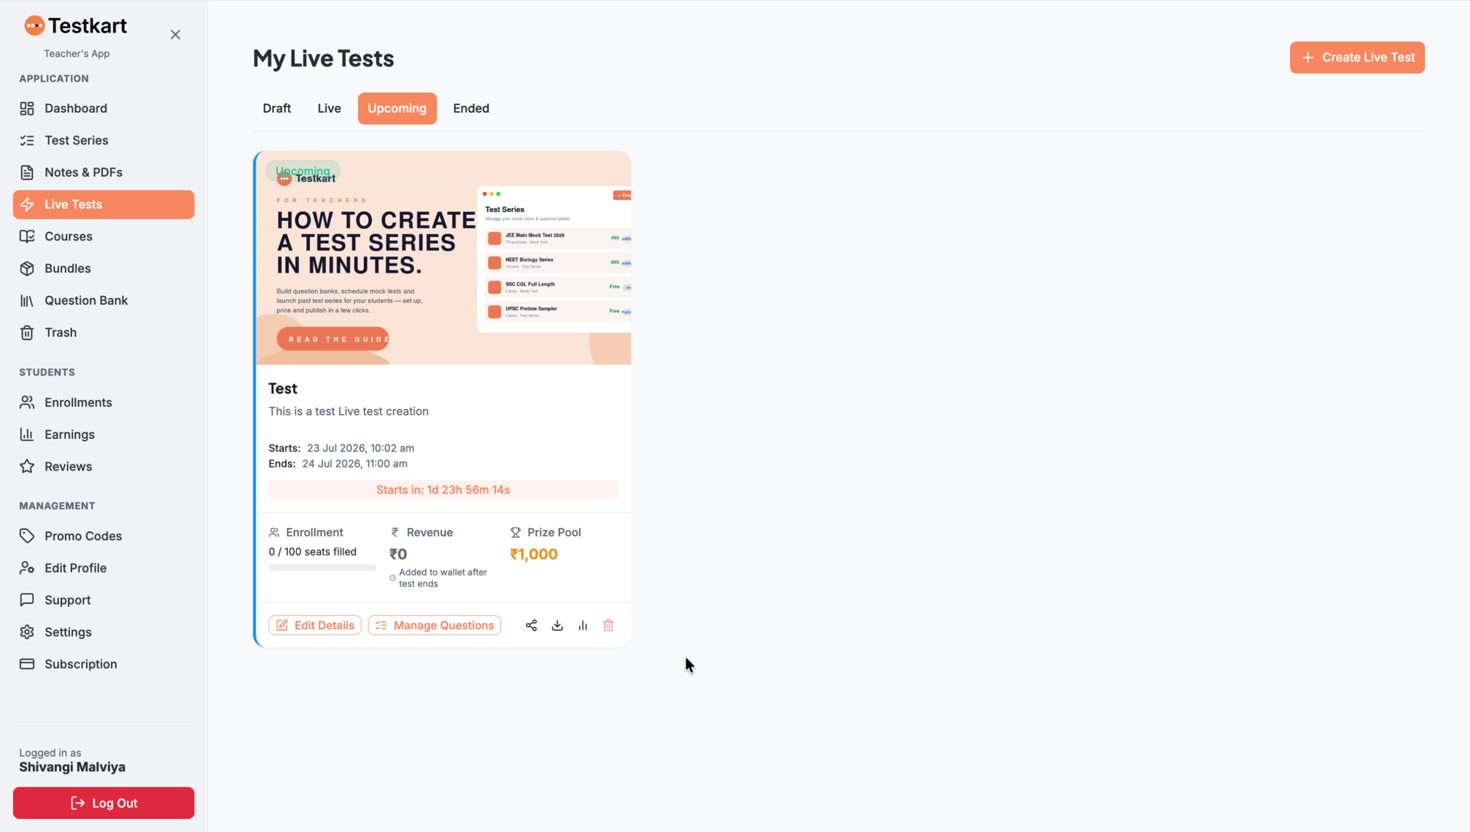
A. Track your test in the Upcoming tab
Your approved test appears under Live Tests → Upcoming with a countdown to the start, plus live Enrollment, Revenue and Prize Pool figures. Revenue is added to your wallet after the test ends.
B. Manage it anytime
Use Edit Details to change settings, Manage Questions to update the paper, and the icons to share, download or delete the test. Analytics become available once the test has ended.