
A Step-by-Step Guide for Teachers
What you will learn in this guide. This guide shows you how to create and sell your own study guide by packaging your courses, tests, and notes together into one discounted package. On Testkart, this packaged collection is called a Bundle, so as you follow along, you'll see it referred to that way throughout the app. You'll learn how to open the Bundles section, fill in your bundle's details, choose which items to include, set your price, and publish it.
This process happens inside the Testkart Teacher's App at testkart.in/. There's nothing technical about it.
Getting Started
A. Open the Bundles section
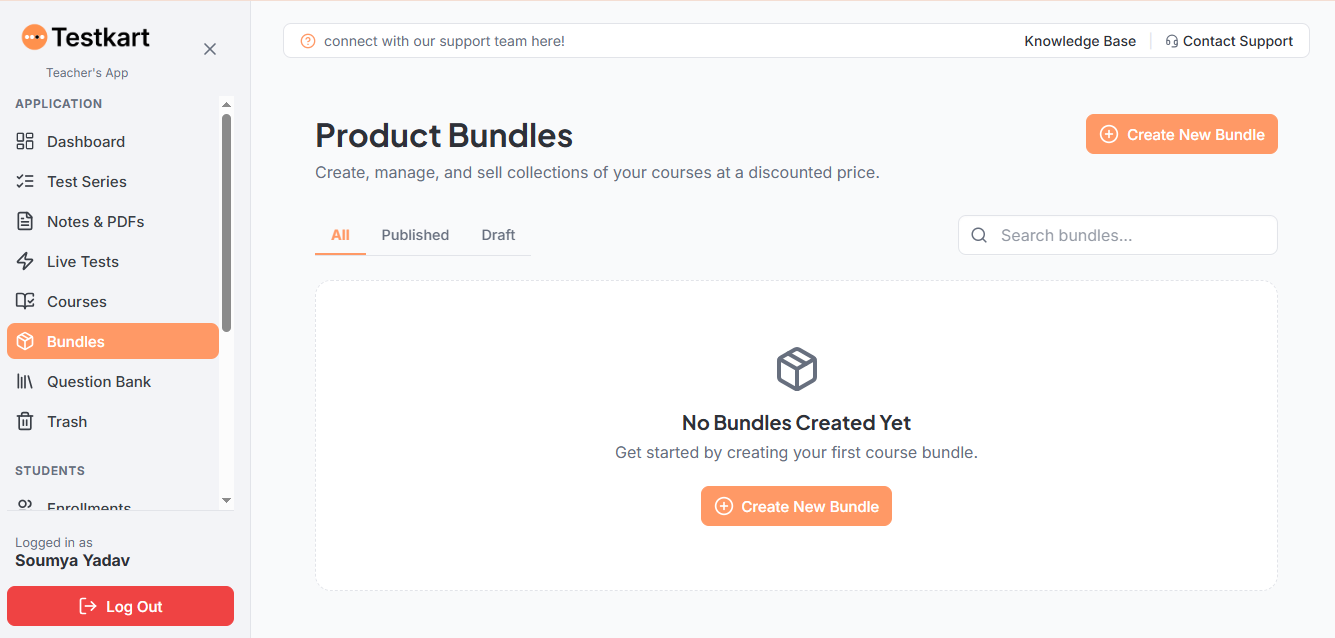
From the sidebar, click Bundles. This opens the Product Bundles page, where you can create, manage, and sell collections of your courses at a discounted price.
If you haven't made a bundle yet, you'll see a message saying "No Bundles Created Yet" with a note to get started by creating your first course bundle.
B. Click "Create New Bundle"
Click the orange + Create New Bundle button in the top-right corner. This opens the bundle creation form.
Step 1: Generate Title & Description with AI
A. Write your Bundle Title
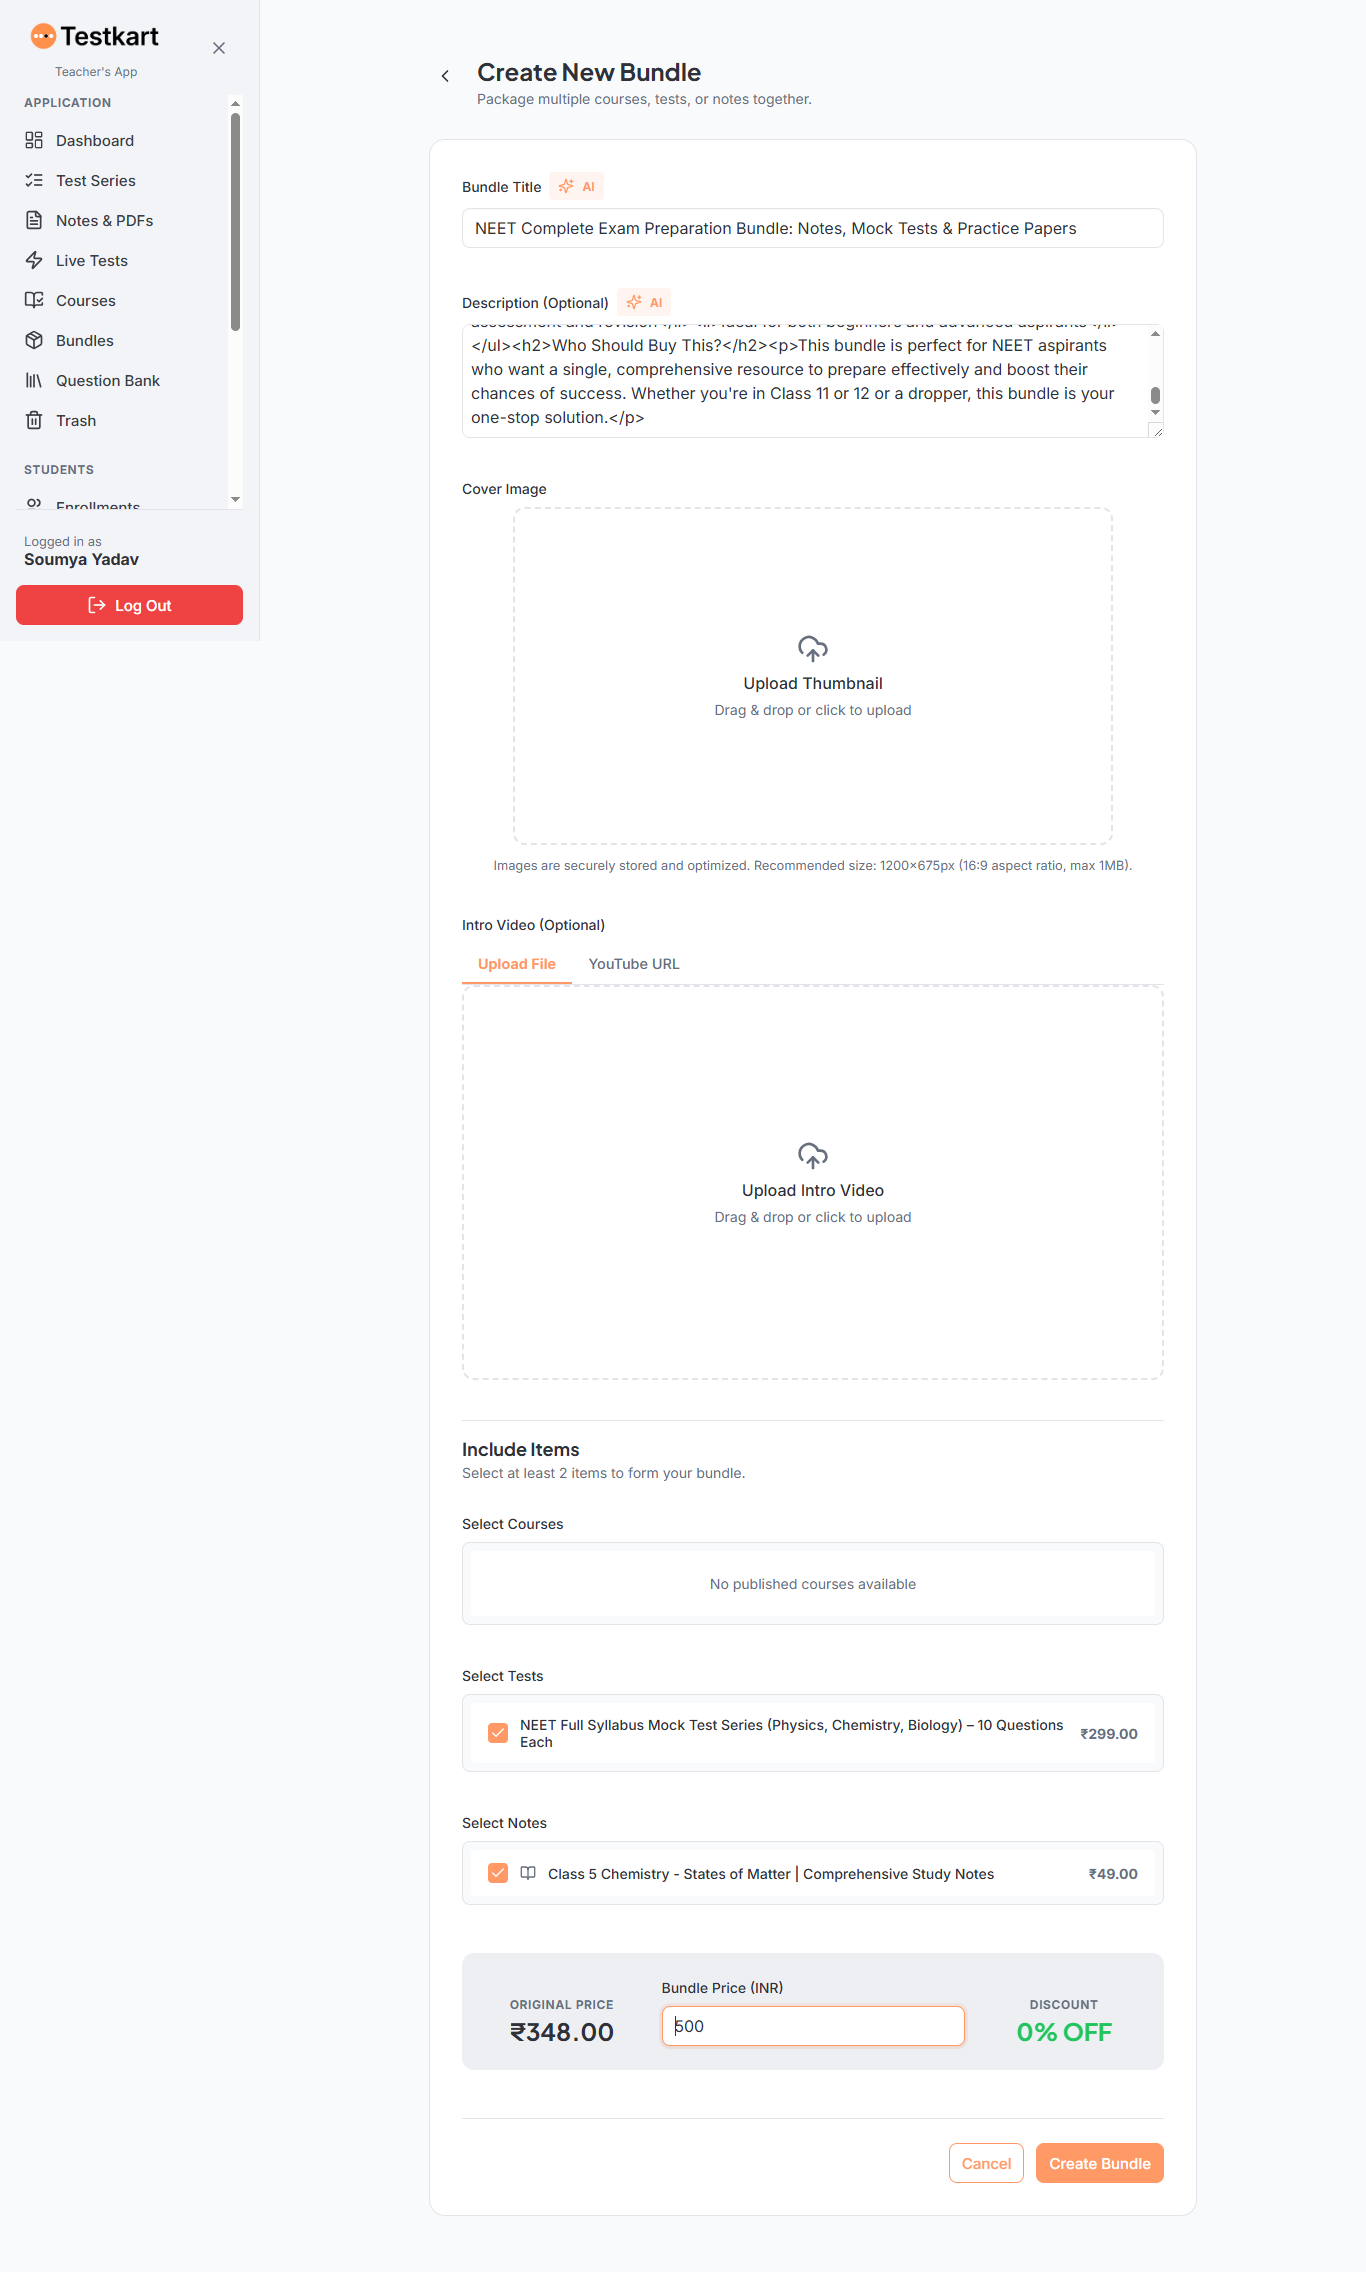
Enter a title for your bundle something clear that tells students exactly what's inside. You can also click the AI tag next to the title field to have Testkart generate one for you.
B. Add a Description (Optional)
Write a short description explaining what the bundle includes and who it's for. Like the title, this field also has an AI tag if you'd like Testkart to write it for you instead.
Step 2: Add a Cover Image and Intro Video (Optional)
A. Upload a Cover Image
Drag and drop an image, or click to upload one. The recommended size is 1200×675px (16:9 aspect ratio), and the file should be under 1MB.
B. Add an Intro Video
You can upload a video file directly, or click the YouTube URL tab and paste a link instead.
Both of these are optional you can skip them and publish your bundle without a cover image or video.
Step 3:Choose What Goes in Your Bundle
Under Include Items, select at least 2 items to form your bundle. You can mix and match from three categories:
A. Select Courses
Choose from your published courses. If you don't have any published courses yet, this section will show "No published courses available."
B. Select Tests
Tick the checkbox next to any test series you want to include. Each one shows its individual price.
C. Select Notes
Tick the checkbox next to any notes or study material you want to include. These also show their individual price.
Step 4: Set Your Bundle Price
Once you've selected your items, Testkart automatically adds up their individual prices and shows this as your Original Price.
Enter your Bundle Price in the box provided. If you set this lower than the original price, Testkart automatically calculates and displays the discount percentage students will see (for example, "57% OFF").
Step 5: Create the Bundle
Once your title, items, and price are all set, click Create Bundle at the bottom of the page. If you change your mind, click Cancel instead to discard the bundle.
After Creating Your Bundle
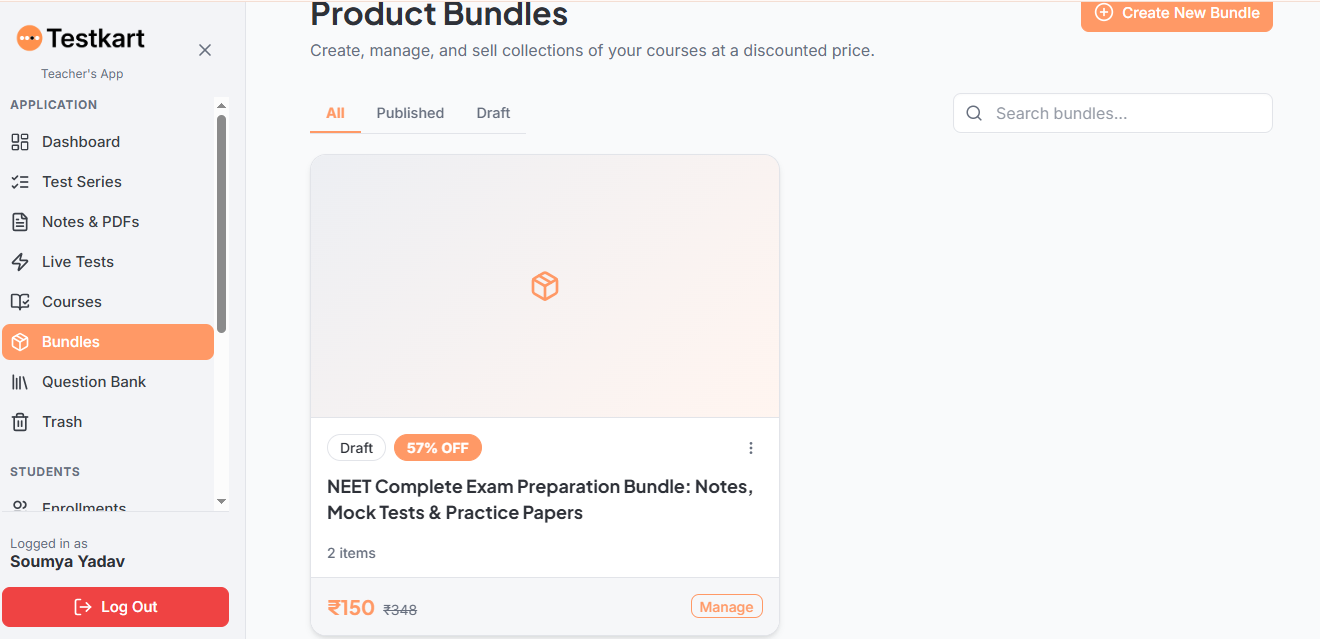
Your new bundle appears on the Product Bundles page as a card showing:
Its status (Draft, until you publish it)
The discount badge (for example, "57% OFF")
The bundle title
How many items are included (for example, "2 items")
The bundle price next to the original price, shown with a strike through.
From here, click Manage on the bundle card to edit it further or publish it when you're ready.
Frequently Asked Questions
How does the AI feature help in creating a bundle on Testkart?
Testkart’s AI feature generates engaging bundle titles and detailed course descriptions automatically. Simply click the AI tag next to the title or description fields to let the platform write them for you.
What items can I include inside a Testkart bundle?
You can mix and match at least two items from your available published courses, mock test series, and study notes/PDFs.
How is the original price and discount calculated?
Testkart automatically sums up the individual prices of all selected items to show the Original Price. Once you enter your desired Bundle Price, the system calculates and displays the discount percentage (e.g., "57% OFF") to students automatically.
Do I need to upload a cover image or video to create a bundle?
No, both cover images and intro videos are optional. You can create and publish your bundle without them.
Can I edit my bundle after creating it?
Yes. After saving, your bundle will appear under the Draft tab on the Product Bundles page. You can click Manage on the bundle card to edit details or publish it whenever you are ready.