
What you will learn in this guide. This guide covers how to edit a live test after you've already created it, updating its details, schedule, and prizes, as well as editing or adding questions. If you haven't created a live test yet, start with How to Create and Publish a Live Test first.
Who this is for. Teachers with an existing live test (published or still in draft) who need to change something about it.
In this article:
Edit Test Details
Edit or Add Questions
Edit Test Details
Step 1: Open Your Live Test
Go to Live Tests in the sidebar and open the test you want to edit. On the test's page, you will see its current status (which can be Drafts, Upcoming, or Live), along with Enrollment, Revenue, and Prize Pool figures. Click Edit Details.
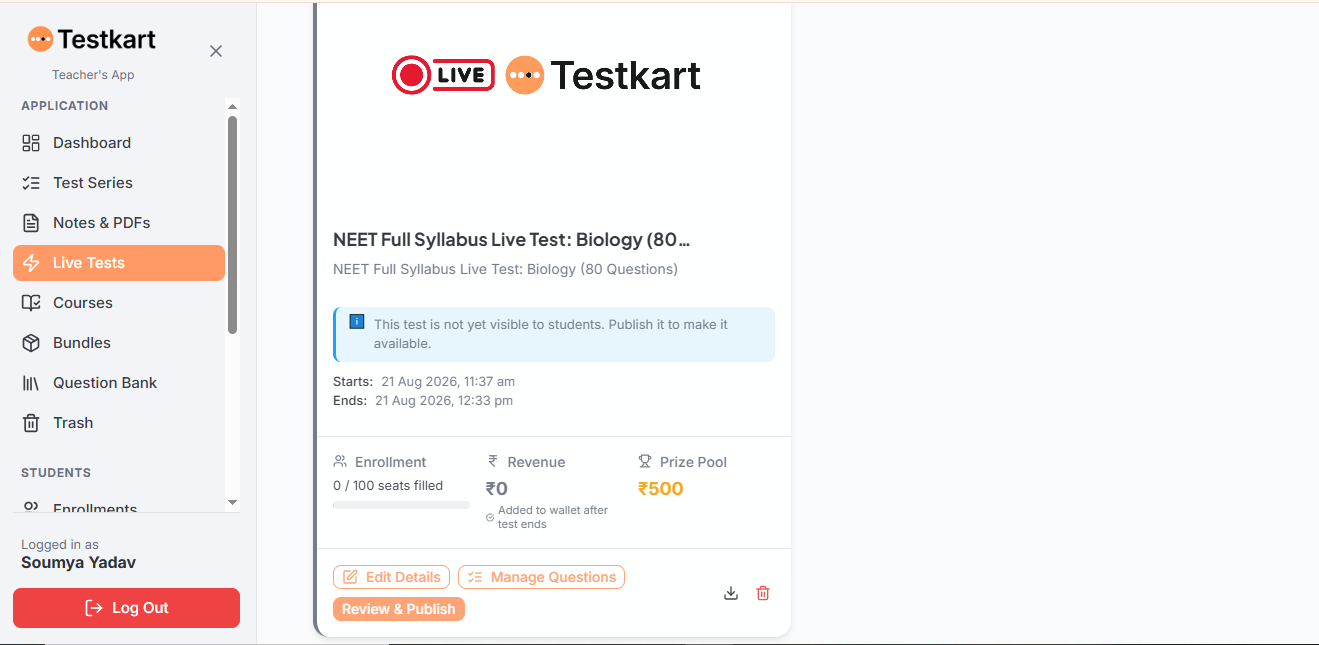
This opens the same 4-step editor used when the test was created: Basic Info → Schedule → Prizes → Review.
Step 2: Update Basic Info
On this step, you can edit the Test Title, Description (both with an AI tag if you want Testkart to help rewrite them), Exam Name, Language, Duration, Price, and Max Seats.
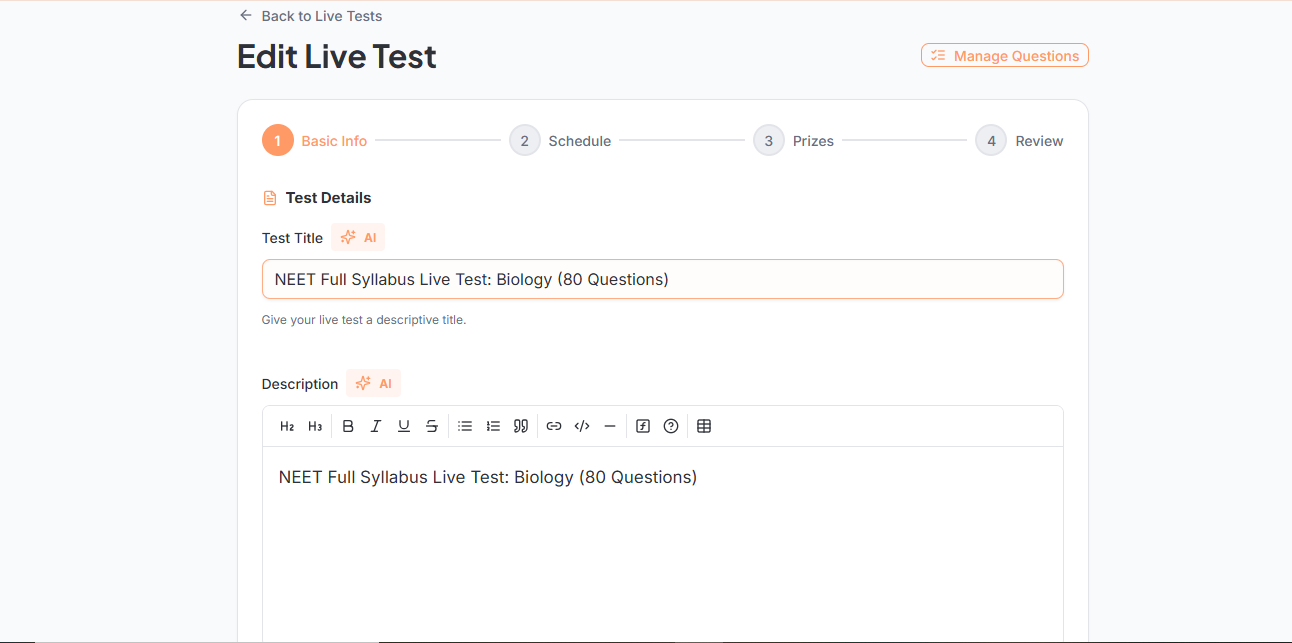
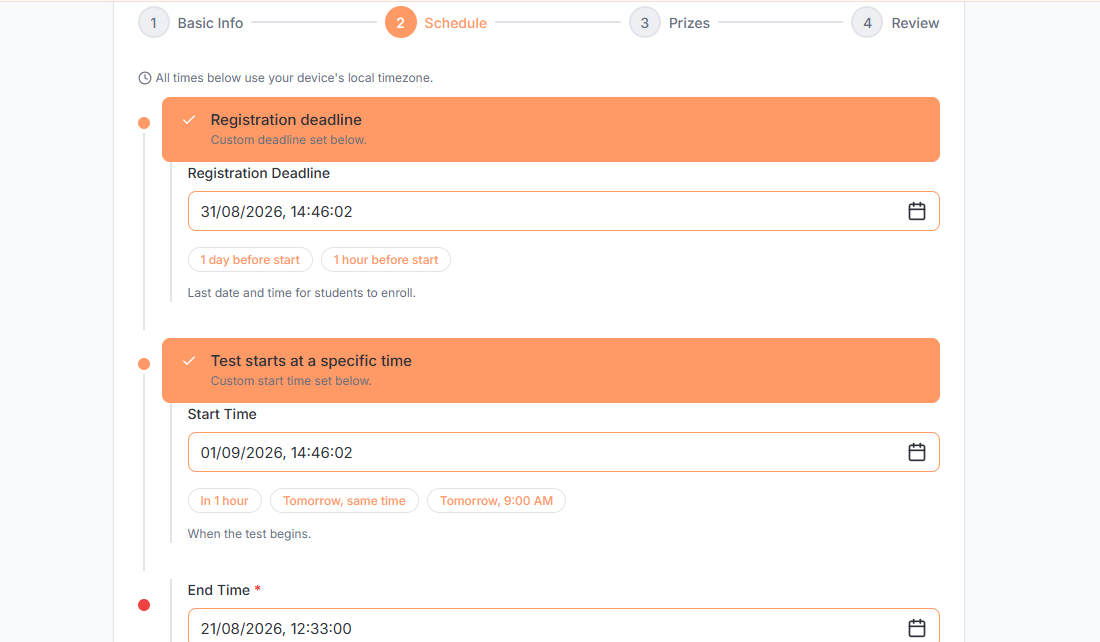
Step 3: Update the Schedule
Move to the Schedule step to change the registration deadline, start time, and end time for your test.
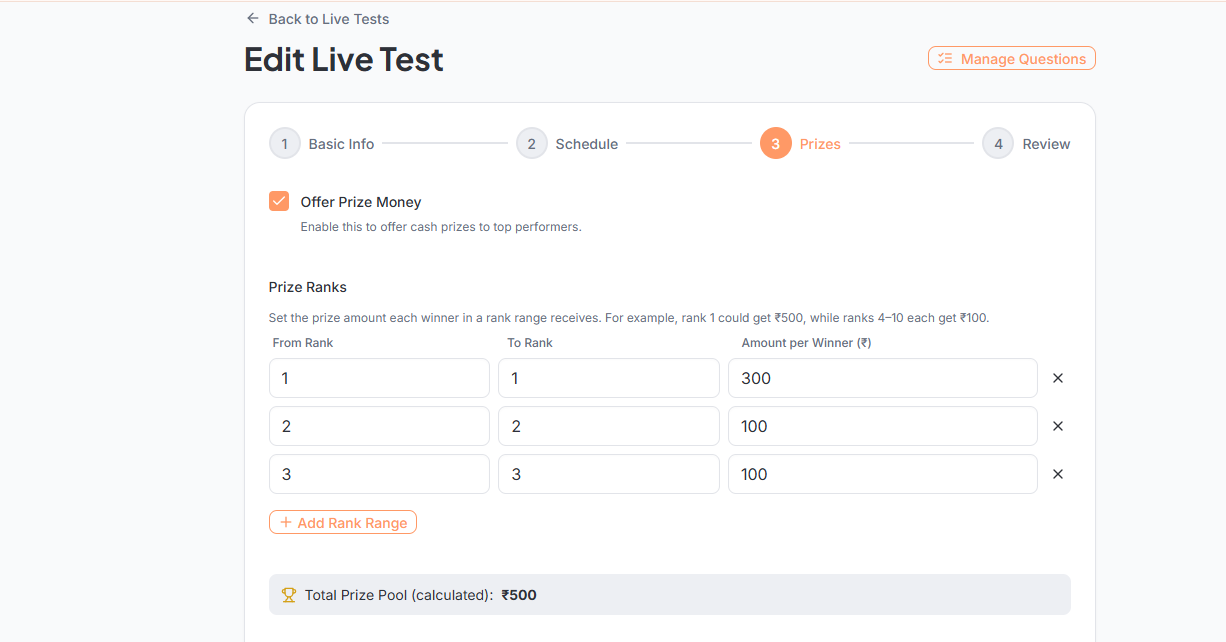
Step 4: Update Prizes
On the Prizes step, you can edit your Prize Ranks each row sets a rank range (From Rank to To Rank) and the Amount per Winner for that range. Click + Add Rank Range to add another tier, or remove one using the × next to it. Testkart automatically calculates your Total Prize Pool based on what you've entered.
Step 5: Review and Save
On the final Review step, double-check everything before saving. Testkart flags any missing optional items here for example, no thumbnail set, no intro video added, no "What You'll Master" points, or no requirements added each with a Fix link to jump straight back and complete it. Use Edit on any section to make further changes.
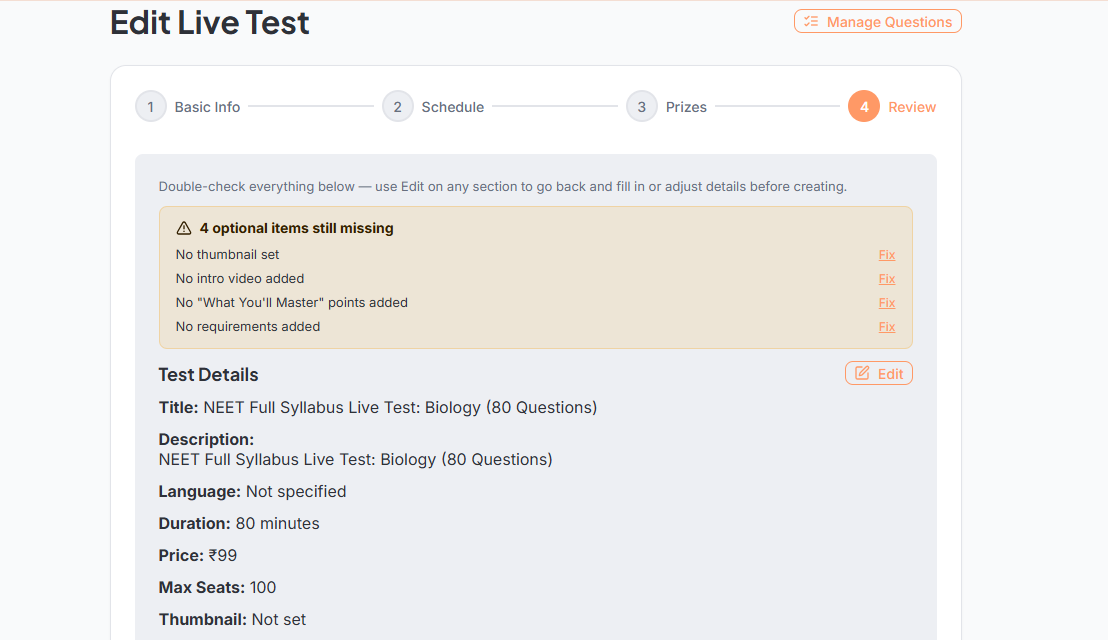
Once everything looks right, save your changes to update the live test.
Edit or Add Questions
Step 1: Open Manage Questions
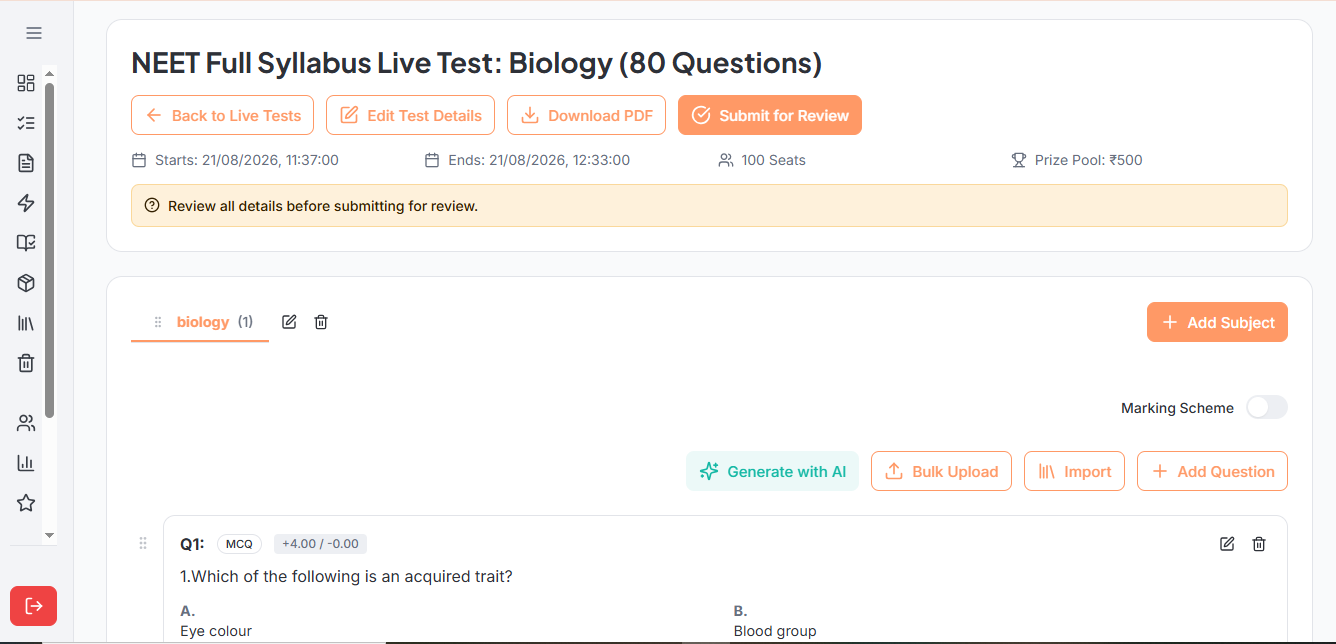
From your live test's page, click Manage Questions. This takes you to the subject and question view for this test.
Step 2: Edit an Existing Question or Add a New One
To edit a question that's already there, click the pencil (edit) icon next to it. To add a new one, click + Add Question.
Step 3: Update the Question Details
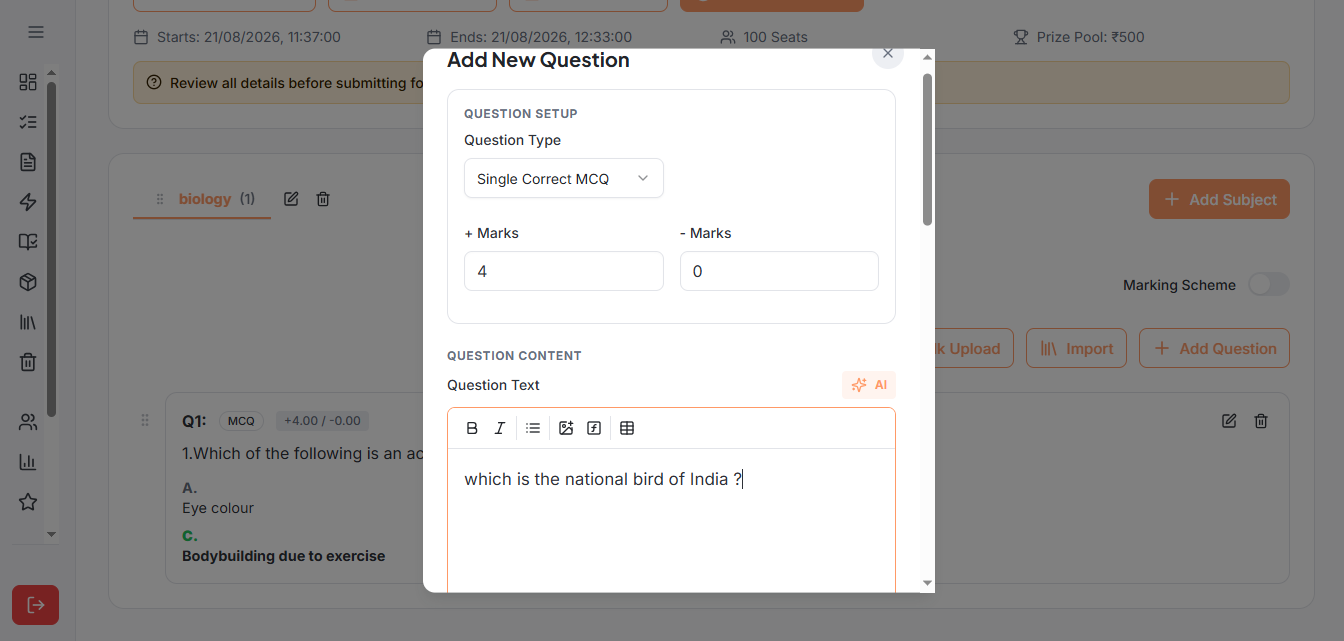
This opens the same question form used when adding questions Question Type, + Marks / − Marks, and the Question Text editor. Make your changes to the question, its options, or the correct answer.
Step 4: Save
Save the question once you're done editing it.
For More Information
If you're setting up a brand-new live test rather than editing an existing one, see How to Create and Publish a Live Test for the full step-by-step walkthrough.